Back to school time is here and parents everywhere are rejoicing. The school year ahead brings so many opportunities for learning, fun and growth. It also brings the not-so-fun struggles of getting children ready and out the door before the sun has even risen. We can’t change what time our kids must arrive at school. But there are a few things we can do to help make school mornings easier.
This post contains affiliate links. See affiliate disclosure here.
Set an early enough bedtime
It is no secret that it is harder to wake up when you haven’t gotten enough sleep. The CDC recommends that preschool age kids get 10-13 hours of sleep a night. That school age kids get 9-12 and that teenagers get 8-10 hours. We always aim for the higher end of the ranges. So even when bedtime takes a little longer, everyone is still getting enough sleep.
Pack lunch/snack the night before.
There is nothing worse than scrambling to make lunch in the morning. While also juggling to get kids dressed and fed and get their teeth brushed. Oh and surprise, you are out of the turkey you planned to put on their sandwich. SO much stress can be avoided by making lunch and packing snacks ahead of time. Don’t forget to pre-fill their drink containers! We love using the Bentgo lunchboxes for our preschool and school age kids.
Pick out clothes for kids AND yourself the night before.
Check the weather and grab an outfit for each of your kids to wear. Make sure to include everything they will need- underwear, socks, jacket, etc. Don’t forget to also pick out what you will wear. You can even have your children sleep in the clothes they will be wearing the next day, if those clothes are appropriate for sleeping.
Pre-make or preselect what will be served for breakfast
If possible, you can can even set out food for each of your kids ahead of time. Any time and effort put in the night before is time and effort that you can save in the morning.
Bedtime Double Check
Before I go to bed for the night, I do a double check to make sure everything is ready for the next day. Any necessary forms are filled out, tuition check is ready, notes to the teachers are written and gas is in my car. If the kids need to bring something to school for show and tell or for any other reason, it is already in their bags and ready to go.
Give yourself extra time
No matter how much you plan and prepare, things will ultimately pop up from time to time that will derail your school mornings. Giving yourself some cushion time helps ensure that even when things do come up, your kids will not end up being tardy.
Get kids dressed AFTER eating breakfast
If you kids didn’t sleep in the clothes they are wearing to school, this helps to avoid needing an early change of outfit if any spills or drips happen during breakfast. We keep our pre-picked outfits for the kids downstairs so they can change into their school clothes without needing to go back upstairs. The shoes they will wear are also already there and waiting.
No TV on school mornings
Television creates what I lovingly call the slow poke effect in kids. While they are tired and paying attention to the TV, they become infinitely slower at everything else they are doing. And in mornings where time is a factor, slow pokes are not welcome. TV can also create reluctance to leave for school, since it is unlikely that their show will end at the exact moment that it is time to go. We instead opt for listening to cheery kids music with Amazon Music, so we can bring it along with us when we transition to the car.
Like with all things, what works for one family, may not work for another. Does something else help your school mornings go smoother? Tell us all about it in the comments below!
If you have landed on this post, chances are that you are considering making the switch to a shared bedroom for your kids. Or you have already made the switch and the transition is not going well. Whatever the reason, you are in the right place.
We never planned to have our kids share a bedroom, but when our third child was born and we were living in a 3 bedroom house, we had to. At the time, the two kids that would be sharing were 2 and 4. The 2 year old was still in her crib. We dove right into the switch and failed miserably. Bedtime became a MESS. Mornings became unbearable with kids waking up 2 hours earlier than normal. I DEEPLY regretted not coming up with a solution that didn’t require my kids to share a bedroom.
Something HAD to give. We have made a lot of changes since then. So here are the tips I wish I would have known before making the switch.
If the bedroom is new to both kids, move one in first.
We ended up using the bonus room as our shared bedroom. The bedroom was new to both kids. We moved my 4 year old son first so that he could get all of his new room exploration out before we moved his sister in.
Potty Breaks before bed
Nothing wakes up the entire room more than one kid getting out of bed and opening the door. Empty bladders help discourage them from getting up.
Use a sound machine (or two if the room is large) to make the kids less likely to hear one another
We have a bunch of different sound machines, but our Hatch sound machine was by far the loudest. It helps so much to drown out the noises that they make. Running a humidifier also helps to add a bit of white noise. Read about my favorite one here.
Put one kid to sleep first (preferably the loudest kid) before the other comes in the bedroom
This is doesn’t have to last forever. But it really helps if bedtime has become a circus because of room sharing. I would put my 2 year old down to bed first and once she was asleep, my 4 year old would quietly sneak in and go lay in bed.
Play Music WITH lyrics at bedtime.
A great way to discourage kids from talking with one another, screaming or fighting is to give them something else to focus on. The easiest solution for us was playing a CD of kids music.
No nightlight in the bedroom
It may sound mean, but my kids are 800% more likely to get up and play around in their room when they can see well. A dark room encourages them to stay in bed. Our compromise is that we put glow in the dark stars on their ceiling. They LOVE them and love laying in bed staring up at them.
Star constellations above Riley’s bed
Visual Barrier between kids
Maybe your children are angels and don’t ever fight. But mine do. All the time. A single look from my 4 year old to my 2 year old and she will immediately start crying. Our kids bedroom is the bonus room, so we arranged their beds so that they were in the dormers. When in their beds, they are very separated.
Okay to Wake clock to encourage kids to stay in bed in the mornings
Our Hatch white noice machine comes with an okay to wake feature. It glows red starting around 5am and then turns green at 7:15am. The green light gives them permission to get out of bed. If they stay in bed until the green light then they get a bribe reward .
Since making these changes, we have far more good nights than we do bad. Many nights where both kids are in bed by 7:15pm and asleep shortly thereafter. Halle-freaking-lujah! Life is finally back to normal and mama gets time to herself in the evenings!
Is there something that worked for you that isn’t on my list? Drop it in the comments below.
Early on in my first breastfeeding journey, I realized that I had to find a long sleeve nursing shirt that I could wear around the house AND sleep in. Covert public nursing is the main goal of most of the nursing shirt. Which is fine, but that often means that there is a fair amount of fabric to maneuver around while feeding baby. But, that just was not what I needed for at home nursing sessions.
My criteria for a long sleeve nursing shirt was fairly simple BUT apparently I was looking for a unicorn:
Long Sleeve (obvs.)
Able to sleep in it comfortably
No buttons to fumble with
Doesn’t have fabric that would have to be held while baby nurses
Milk stains are able to be washed out of fabric easily
Long enough to be worn with leggings
Loose enough that my postpartum fluff is not highlighted
Must have more than one color available
Ideally, not too expensive so I could get a few
This post contains affiliate links. See affiliate disclosure here.
I wear these over a basic nursing camisole and they are so comfortable. There are a few different brands selling these type of tops on Amazon. I have bought from most of them and they are all pretty much the same. Lightweight material, criss cross drape in the front and above all, it provides SUPER easy nursing access. The biggest difference between sellers is the colors each has available. I started with the three pack from Free to Live in 2015 when my first baby was born and I am STILL wearing the original three. They are the best. In conclusion, if you are breastfeeding or are planning on breastfeeding, you need these long sleeve nursing shirts in your life.
When I was pregnant for the first time, I quickly registered for a humidifier that had good reviews and seemed to be well liked by parents everywhere. My son was born in December and immediately slept in our room. We didn’t use the humidifier until months later. Very quickly I decided that what we had was absolute CRAP. It left the ground around it soaking wet. It ran out of water within a few hours. The tank molded and was impossible to clean.
I knew I needed a different humidifier but was weary of making another poor purchasing decision. My criteria for a humidifier was pretty reasonable:
Large enough tank to run overnight without running out
Easy to clean parts
No mold
Doesn’t soak the ground around it
Ideally, no filter would be needed
This post contains affiliate links. See affiliate disclosure here.
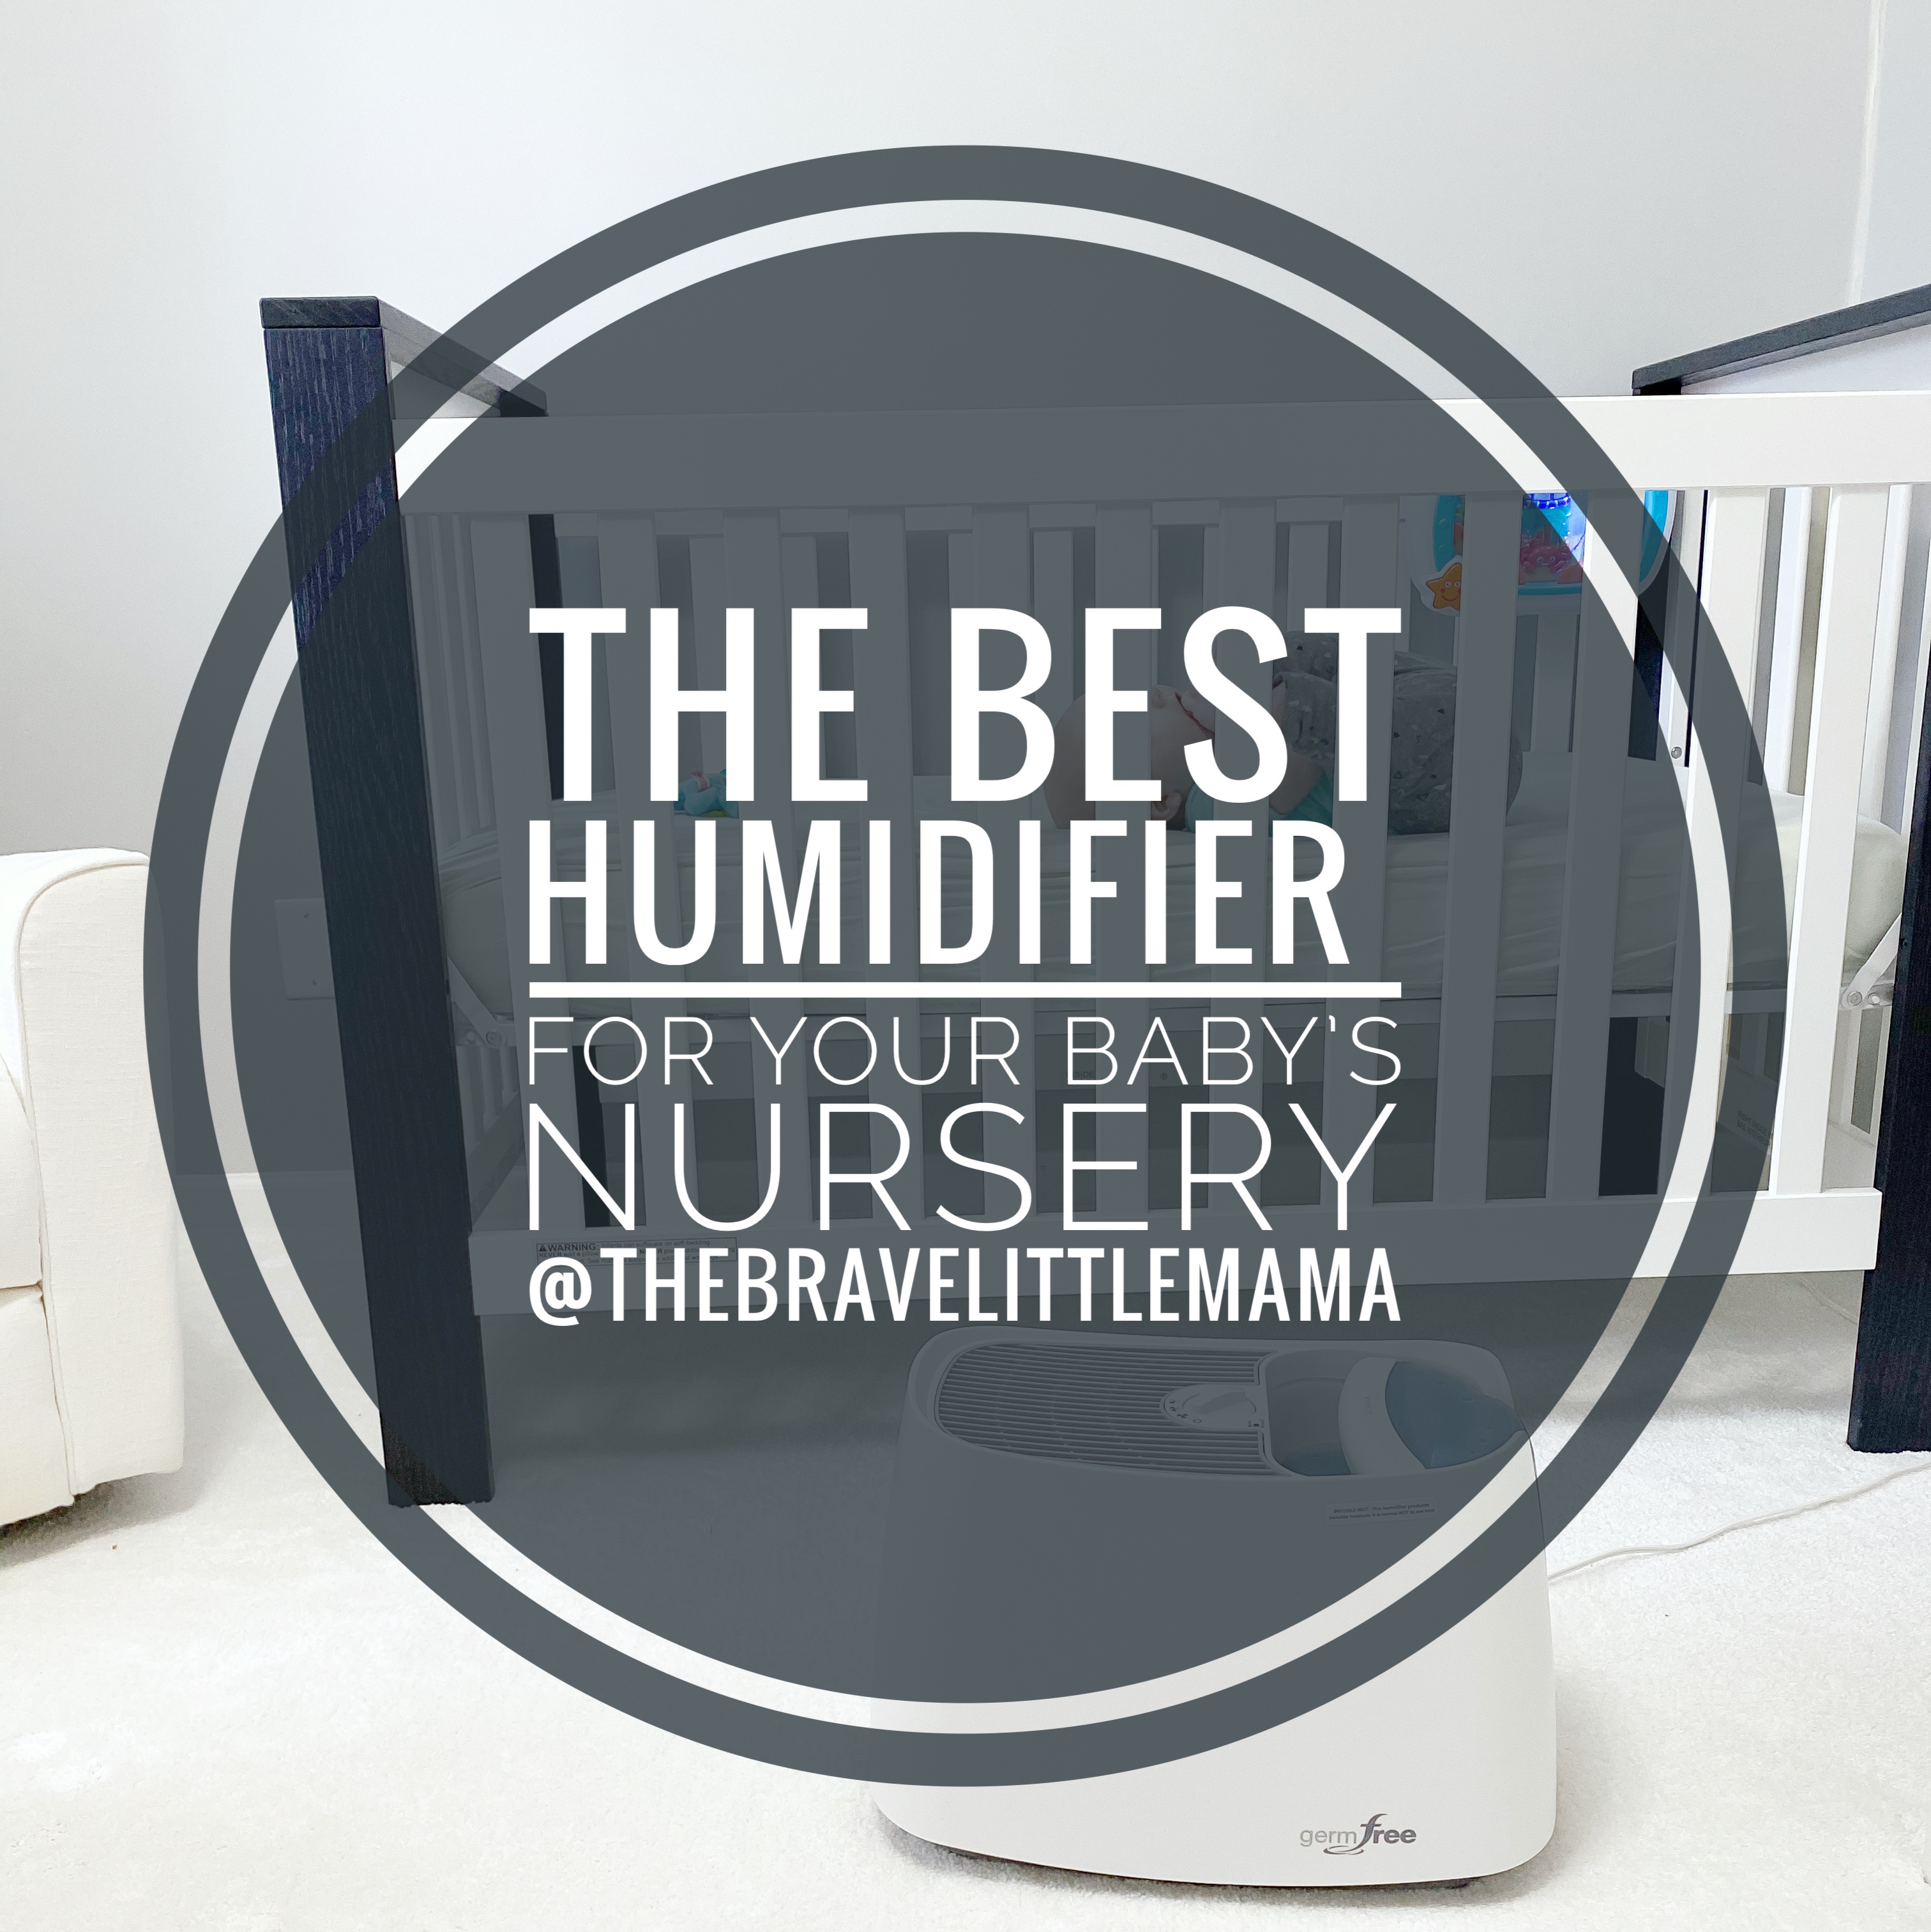
I searched and searched for another humidifier. A mom in one of my FB mom groups wrote a raving review about her humidifier. It did have a filter, but she was so happy with it, that I decided to take a leap of faith and try it out. Y’all- this humidifier is the BEST!
The opening of the tank is huge, making cleaning easy. PLUS, it is dishwasher safe.
It uses evaporation to humidify the air. This means it blows moisture off a wicking filter, helping it evaporative into the air quickly.
**Major Selling Point** There is a UV light inside that sanitizes the water before it reaches the filter. It kills up to 99.9% of bacteria, mold, fungus, and virus that could be present in the water.
I ordered my first unit in February of 2018 and another a year later. They run for a majority of the year in both of my kids’ rooms. I have never seen mold on either humidifier. It can run on high overnight for 12+ hours before running out of water (depending on how dry the air is). I replace the filter monthly, but using this off brand replacement filter keeps the cost very reasonable. The Honeywell Germ Free Cool Mist Humidifier is now one of my main recommend items for all my pregnant friends.
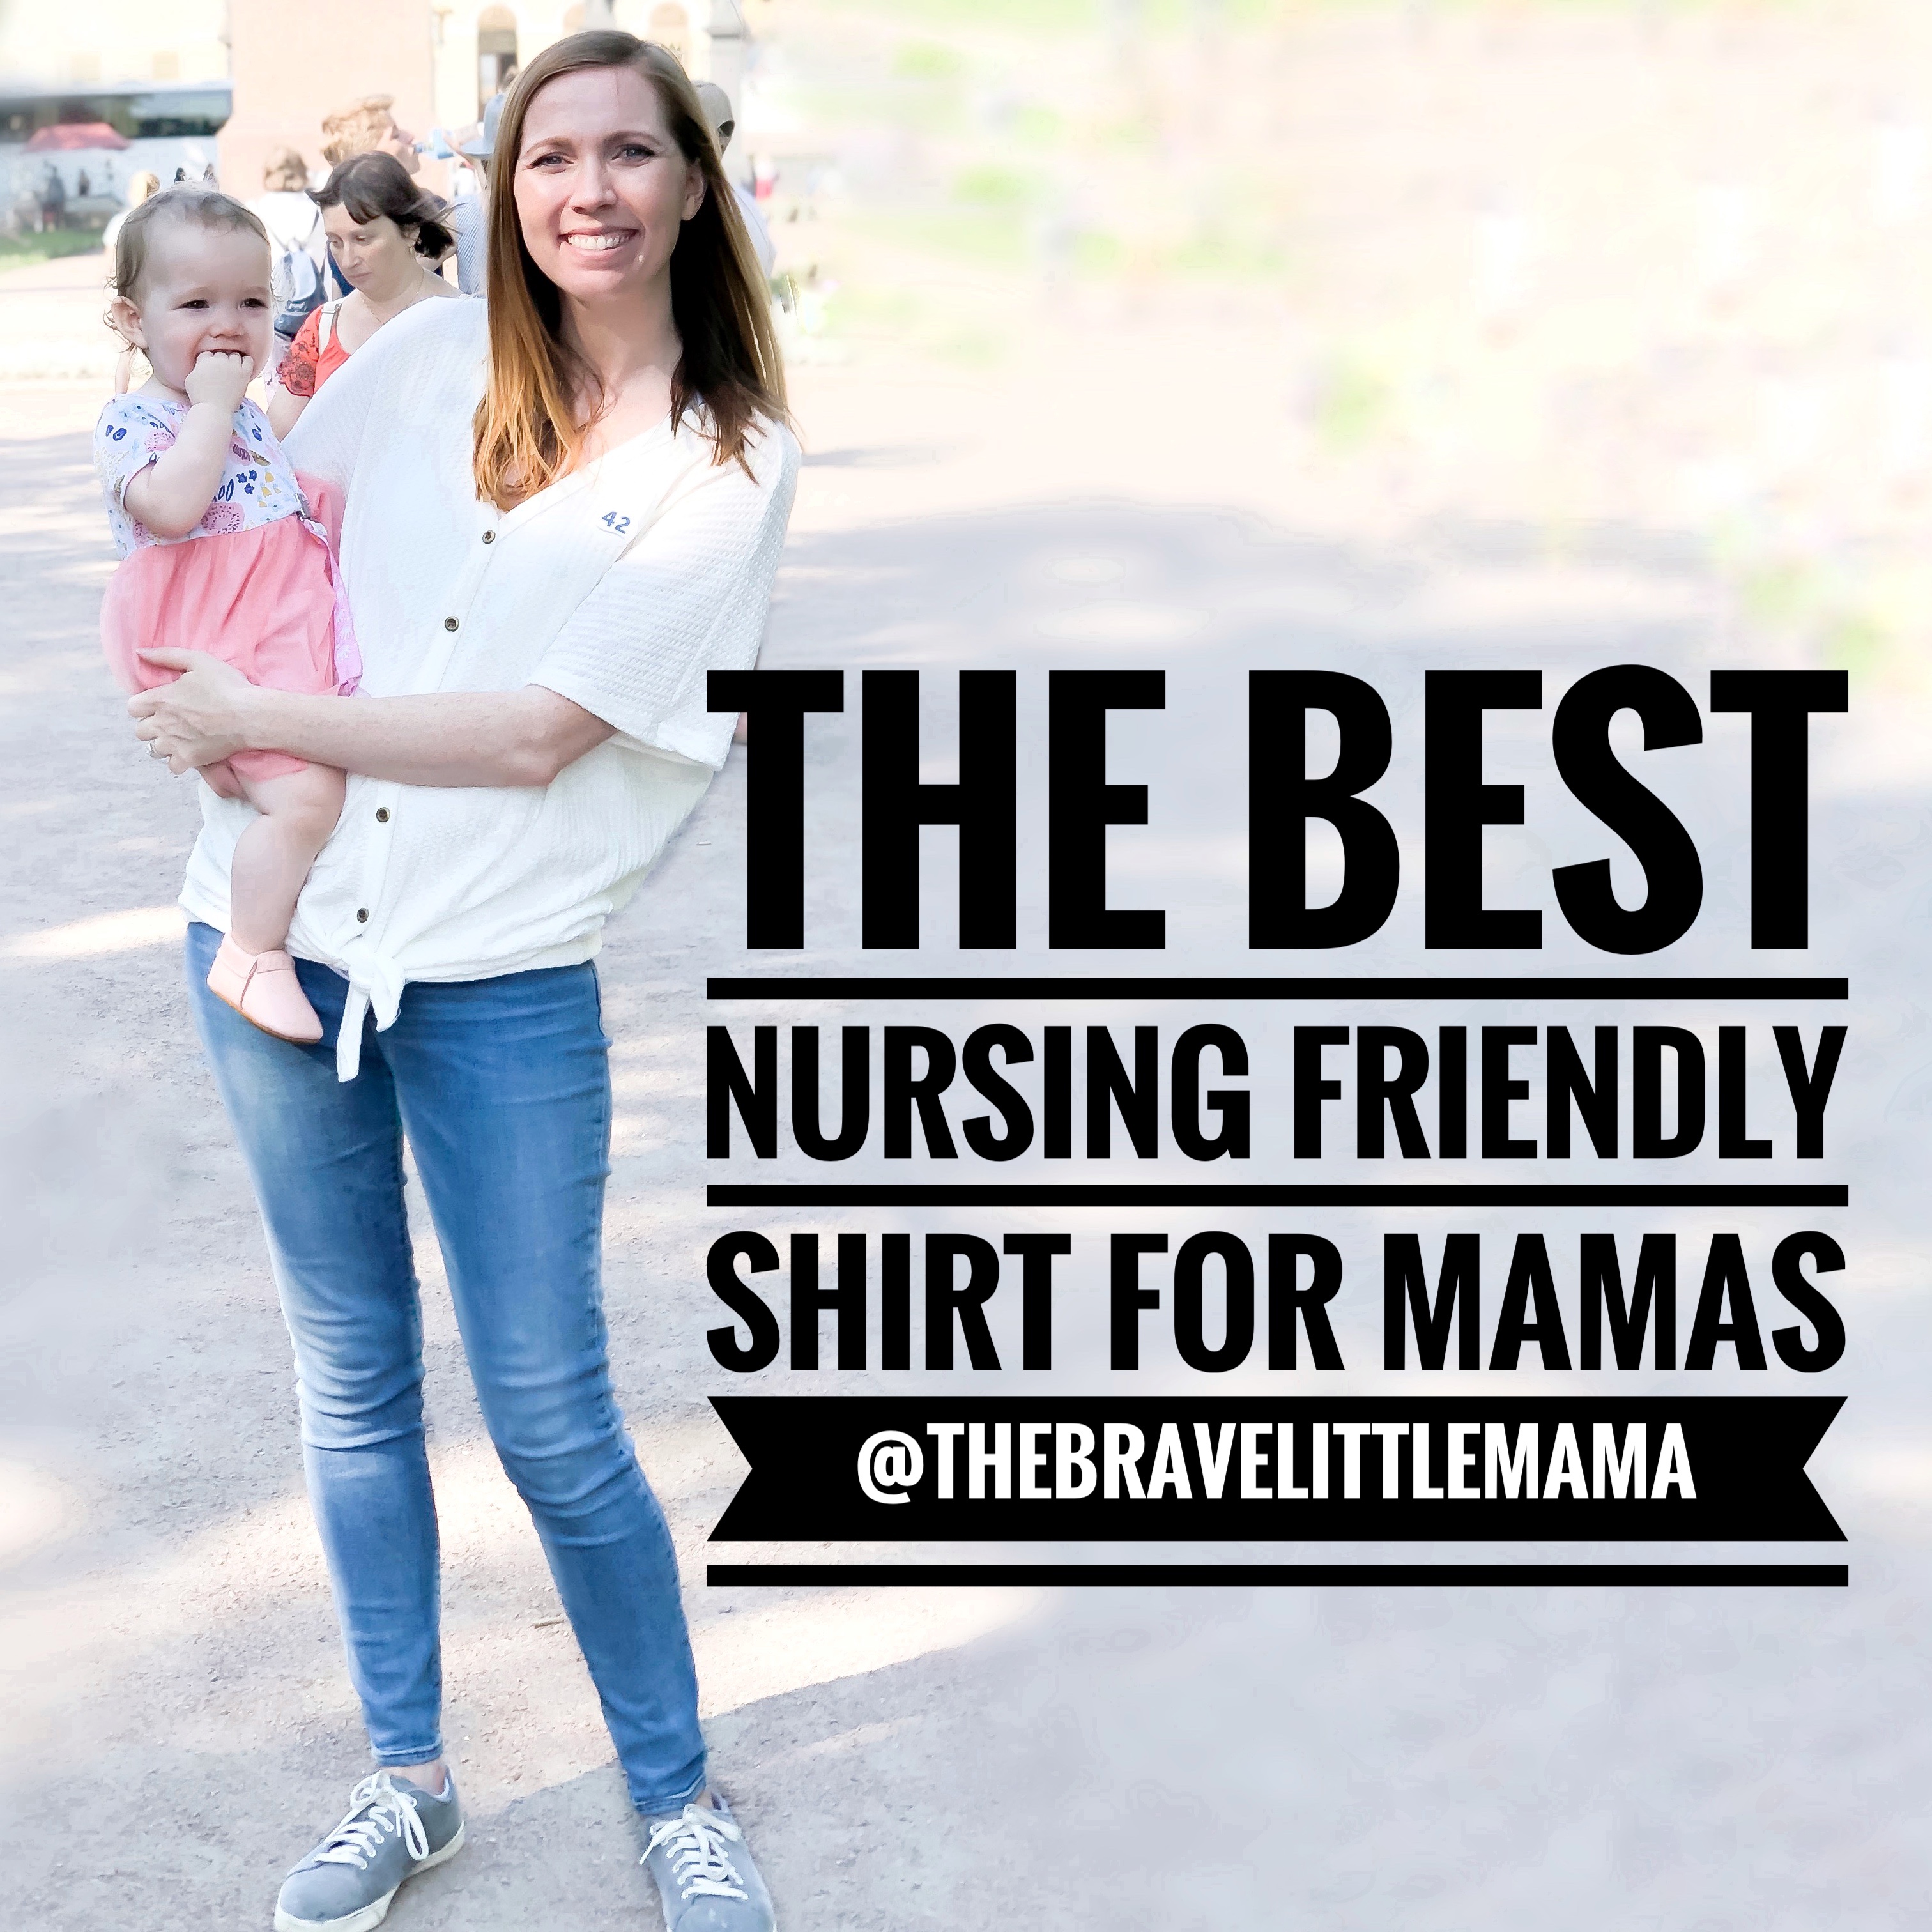
Whether you are a month into your breastfeeding journey or are a seasoned pro, the search for breastfeeding clothing is a challenge. Finding the best nursing friendly shirts is not easy. Many tops that are cute are expensive, or they are unflattering on most postpartum bodies. Other tops look weird in order to be able to accommodate breastfeeding access. Who wants to spend money on clothing that will be discarded after nursing is over.
I am a SAHM of three littles, so finding nursing friendly clothing is important since I wear it every moment of my life. My standards are high.
This post contains affiliate links. See affiliate disclosure here.
My requirements when looking were:
Easy access for nursing
Easy to keep shirt out of the way so it doesn’t get wet with milk
Does not get milk stains that don’t wash out
Long enough to hit below the waist
Loose enough that my postpartum curves are not highlighted
Attractive colors
BONUS: Available in a long and short sleeve option
The fabric is so freaking soft. The waffle material makes it look so much nicer and dressier than it is. The buttons are easy to unbutton one handed. The shirt opens wide enough to get out of the way so it doesn’t get soaked with milk. IT. IS. THE. BEST. The cut makes it loose and flowy without looking frumpy. Can you tell I love this top? I have five of them and another four are on their way to me this week! I wear them with leggings or with jeans (okay, jeggings).
There are so many color and pattern options available. 35 options to be exact. And there is a long-sleeve version that is just as flattering. I wear this shirt in size small and it fits well on my 5’7″ size 6 frame. I have had some of my tops for over 2 years and they still look great. For the two months that I had in between breastfeeding my second baby and my third pregnant belly popping out, I wore these shirts. Even when I don’t need the nursing feature, they are still a favorite. Plus, you can Amazon PRIME them to your house with free 2 day shipping!!!
Still looking for more nursing friendly clothes? Check out my other blogs:
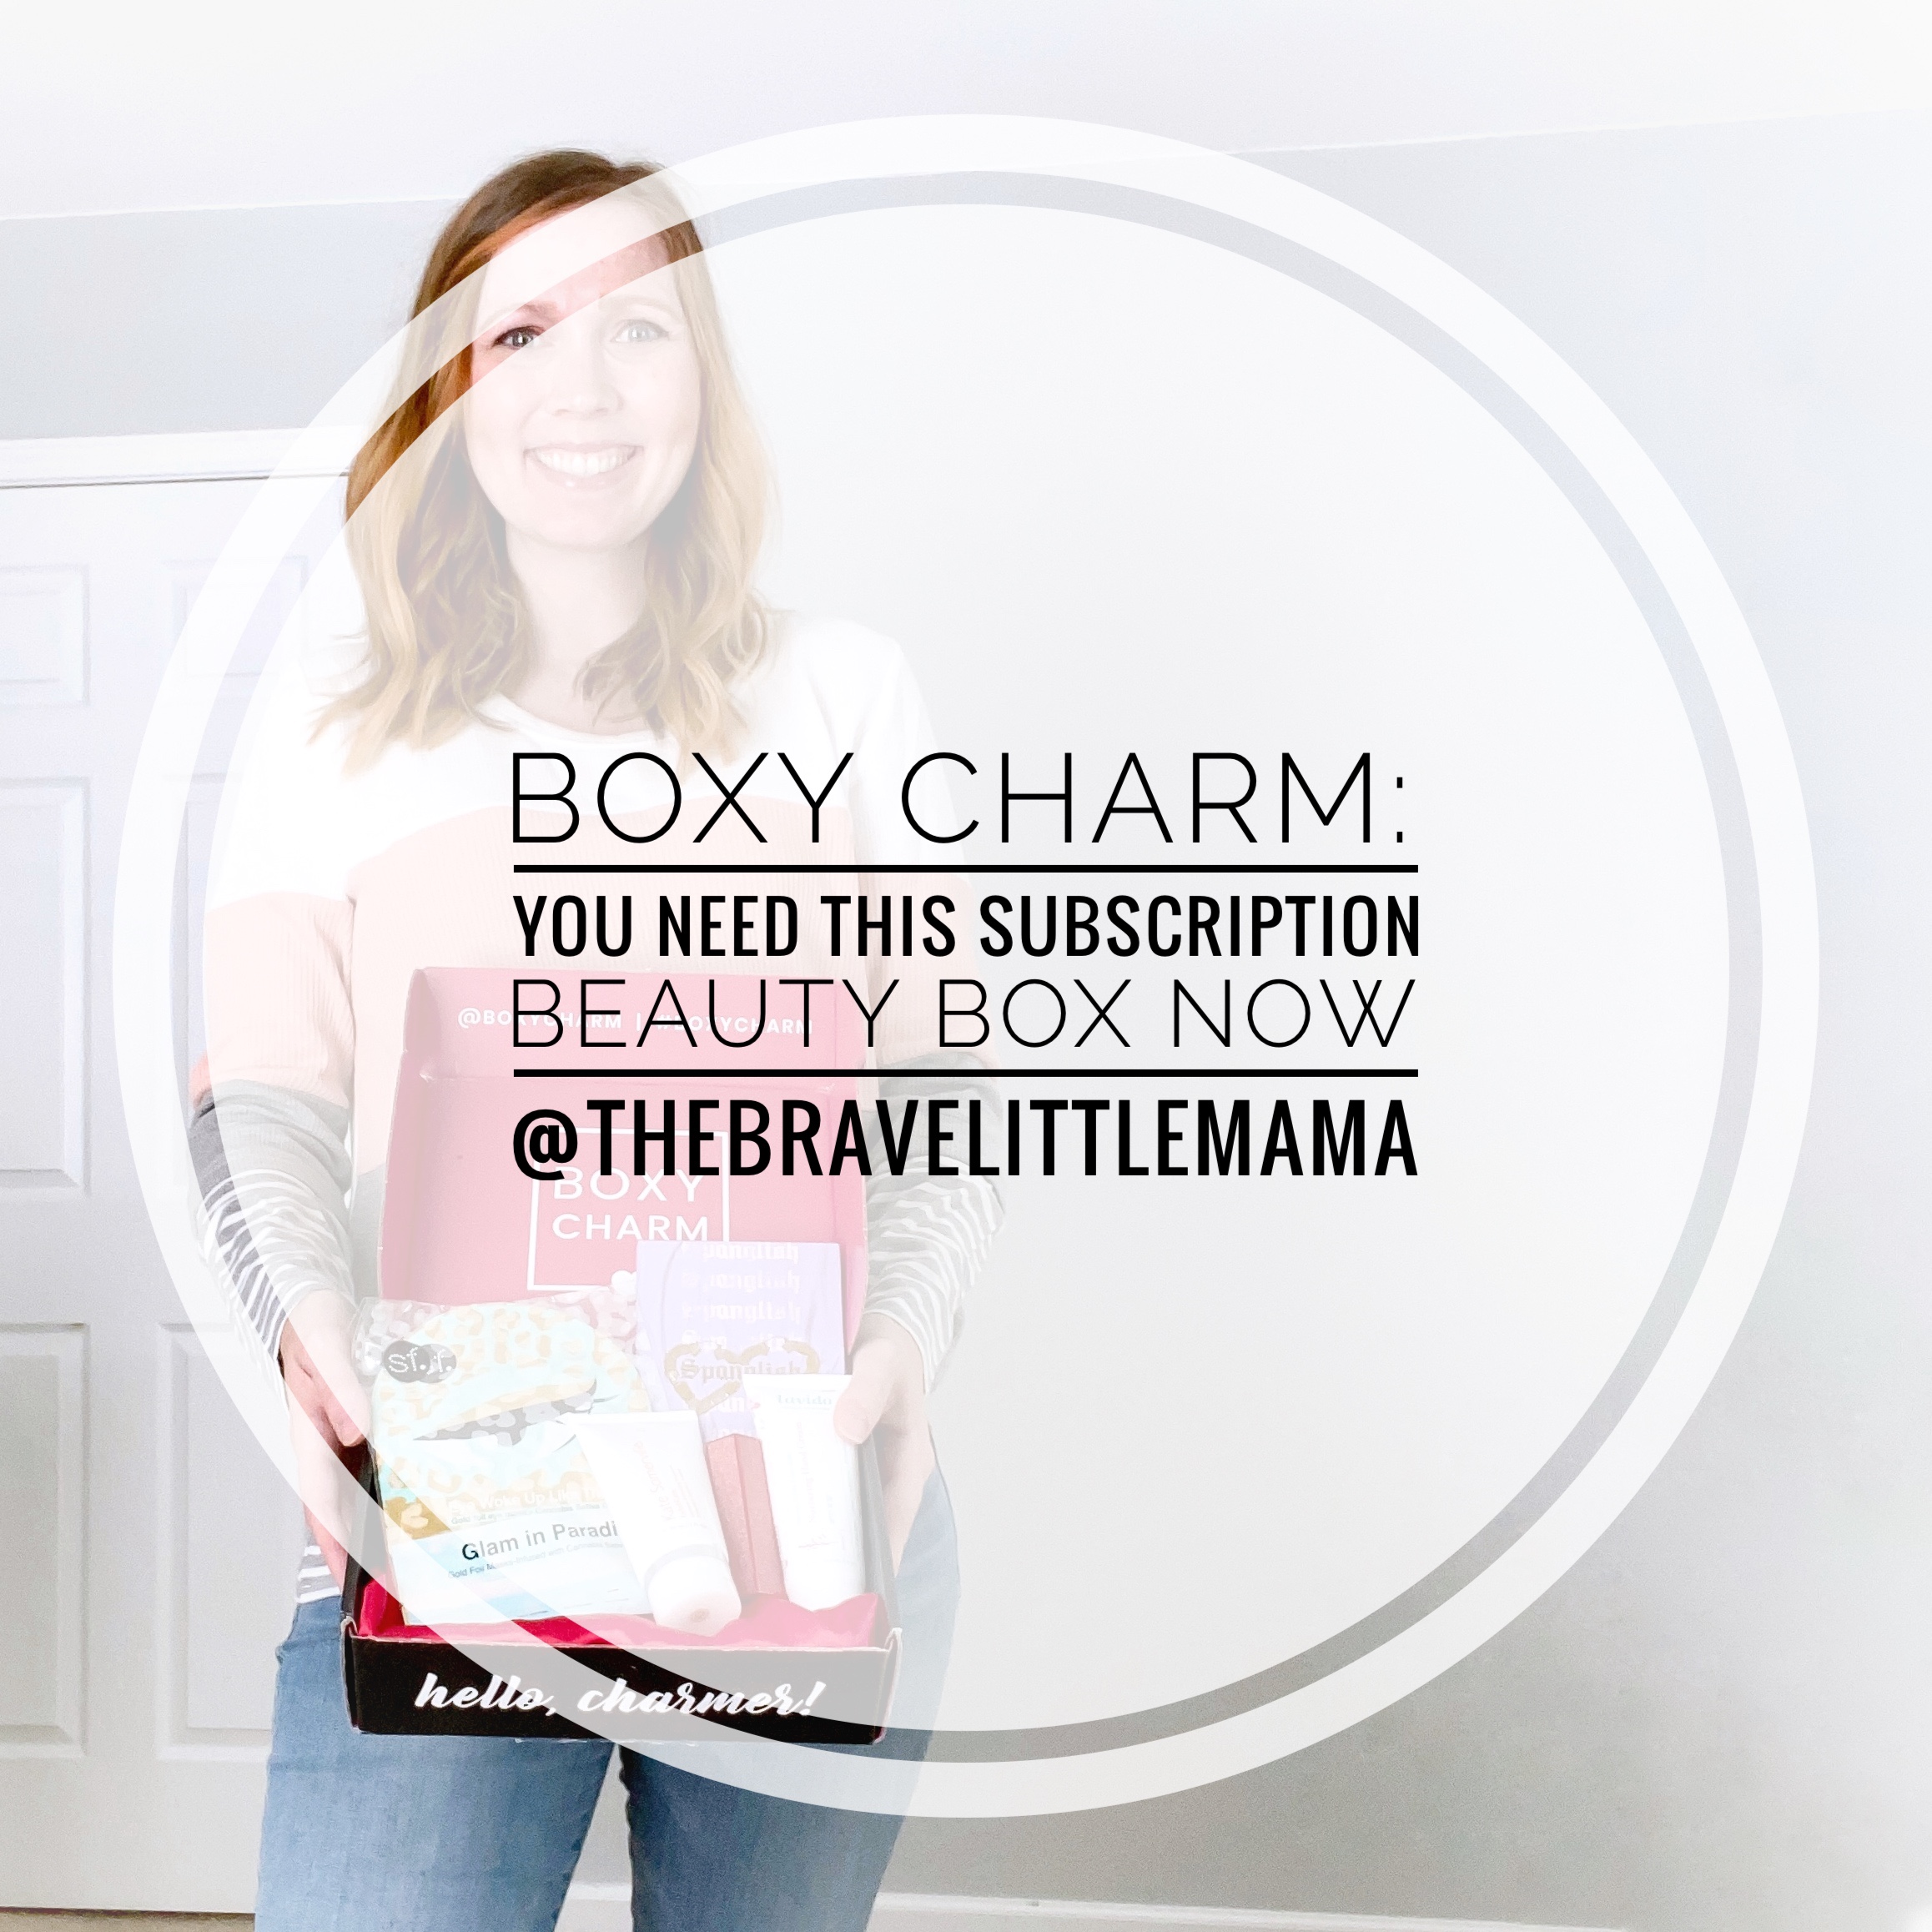
Boxy Charm reached out to me in April. I was very pregnant. They asked if I would like to sample a beauty box. OF COURSE I would! I mean, who doesn’t like to try out new beauty products?
This post contains affiliate links. See affiliate disclosure here.
What’s Included with Boxy Charm?
Every month you receive 5 FULL-sized beauty products. These items can be make-up, beauty tools, skin care products or even hair products. Every box has an average value of $175. This means that the products that are included are luxury brands. You are unlikely to be able to buy these things at your local drug store.
I am not usually one to spend money on new products. However, I also love to try out new things. THIS is why Boxy Charm is so awesome. For a fraction of the value, you can try out new things every month. Talk about Happy Mail! Sign up for you own Boxy Charm Box here!
My Favorite Finds?
I have received SIX boxes so far, complements of Boxy Charm (thankkkkk you!). I have found a bunch of products that I love. It’s hard to pick which are my favorites. These are some of the items that I will likely purchase on my own once the one included in my box runs out:
Glamglow Berryglow Probiotic Recovery Mask 2.5 Oz Unisex, 2.5 Oz
First Aid Beauty KP Bump Eraser Body Scrub Exfoliant for Keratosis Pilaris with 10% AHA
SOL DE JANEIRO-Brazilian Kiss Tinted Cupuaçu Butter Lip Balm in Teeny Bikini
Studio Make Up EASE TO WEAR PALETTE– Boxy Charm Exclusive
Least Favorite Finds?
I am all about transparency. So I feel like it is only fair to mention that I do not love every single item I have received. Some items have had scents that are not my favorite. Some items have been a little dark for my very pale skin. I have received an eye shadow palette every single month. I have LOVED two of those palettes. But some of the others have had very vibrant colors that I probably will not wear on a regular basis. But, getting to trial out items that you might love or might not love is the charm of these boxes! (See what I did there!)
Why is Boxy Charm worth it?
For $22.92-$25 dollars a month (the more you subscribe to, the lower the cost), you receive FIVE awesome items. Every month, I look up the value of my favorite finds. I discover that it is generally well over the 25 dollar mark. So even if I would have found the item in a store (which I never would have taken the time to do), I would have spent more than $25 on it. And I wouldn’t have gotten to try out the other FOUR items.
Luxe Box- Every 3rd month you receive the upgraded box. It includes 8 full sized beauty and lifestyle items. Box average value is $395. The Luxe Box upgrade costs an additional $24.99
Premium Box- Every month you receive an upgraded box. For $35 you receive 6-7 full sized items each month. The premium box average value is $215.
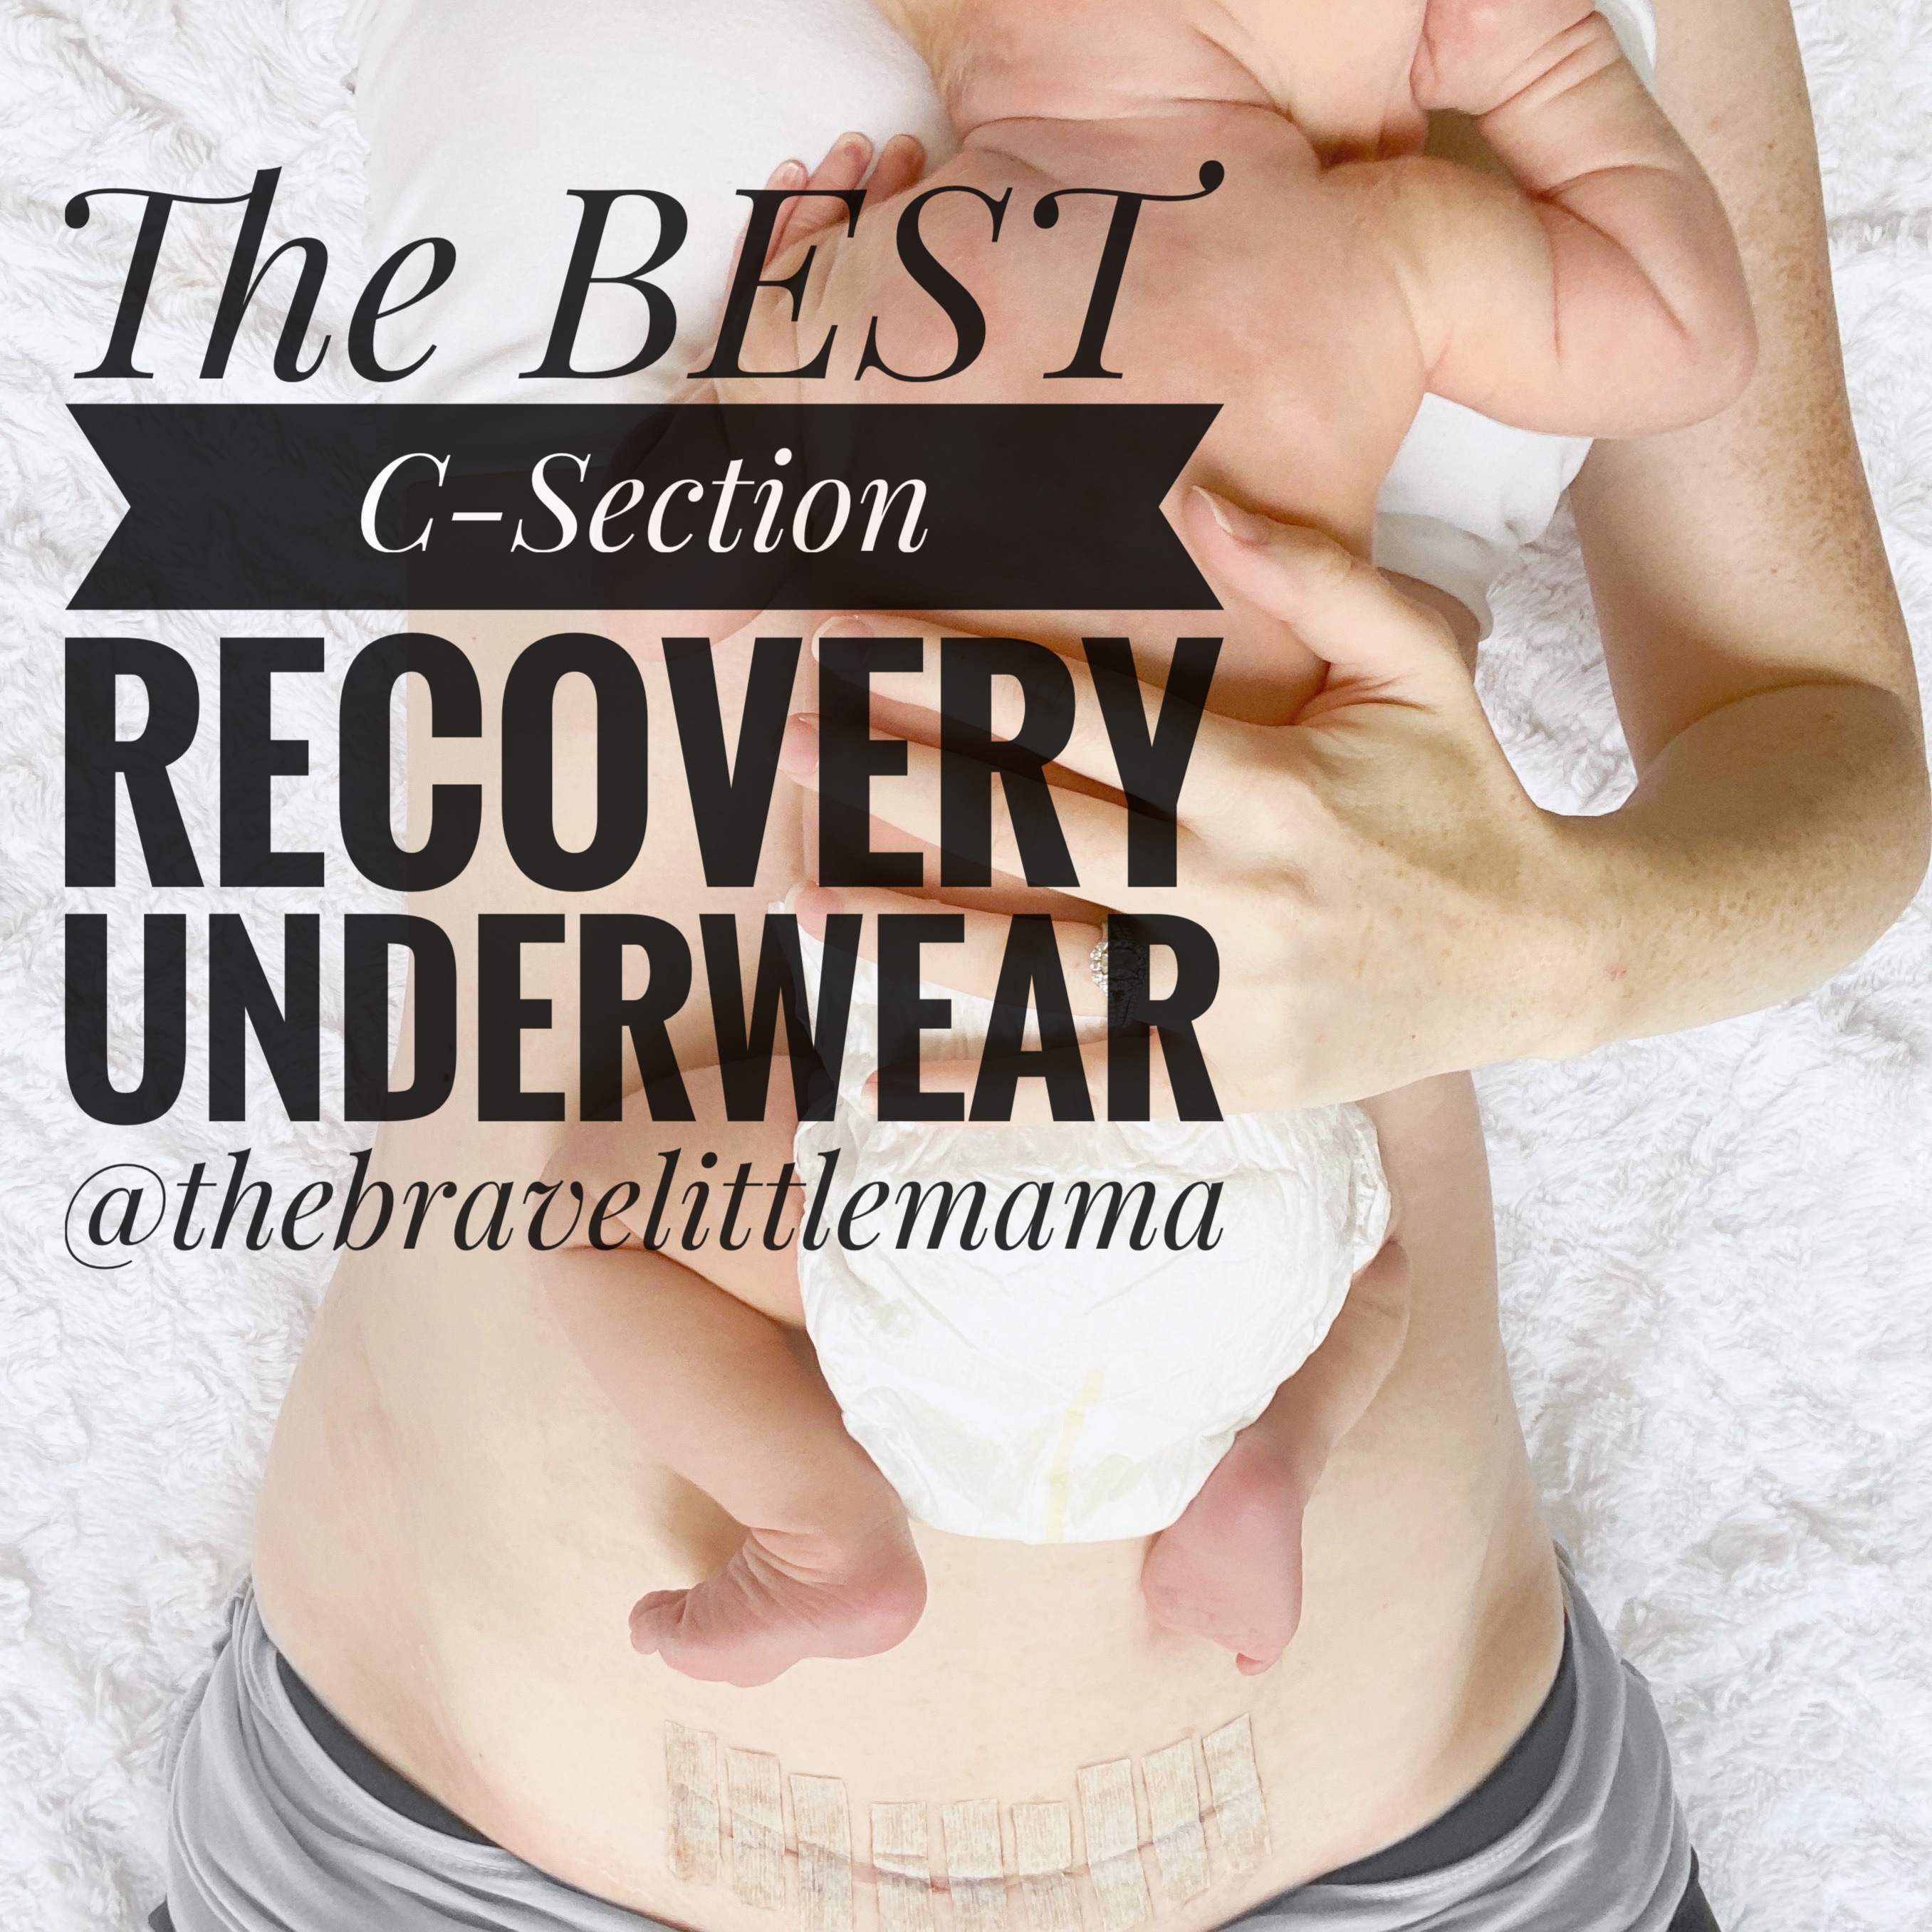
After my third baby ended up being delivered via emergency c-section (you can find his birth story here), I found myself completely unprepared. All the things I thought would work for my postpartum recovery, would not work and I was left frantically online shopping from my hospital bed.
I searched high and low for the best underwear for those first weeks following my c-section surgery. Here is a list of my favorites:
This post contains affiliate links. See affiliate disclosure here.
Weeks 1-6 Post C-Section
I found that soft, stretchy and super high-waisted was the best during the first month.These underwear worked well for fitting comfortably on my ever shrinking belly without rubbing on my incision. Plus they worked well under my abdominal binder (I used this one). If you are between sizes, go with the larger size.
The C-Panty is amazing. Part shapewear, part post c-section surgery support. It is much tighter fitting which works perfect once you are ready for a little less support than the abdominal binder offers. These undies smooth and compress, giving a slimmer/smoother looking belly. Plus as a bonus, they have a silicon sheet that is supposed to help minimize the appearance of scars. I ordered my pre-pregnancy size in these. They were very tight and uncomfortable prior to the 6 week mark. But once the 6 week mark hit, they were perfect. I got the 2 pack so that I could easily wash one while wearing the other.
Around the 12 week mark, I started feeling like I didn’t need as much support as the C-Panty was providing. I wanted something that wouldn’t rub on my c-section incision and wouldn’t be visible under yoga pants. I found what are possibly the softest undies every. So freaking comfortable.
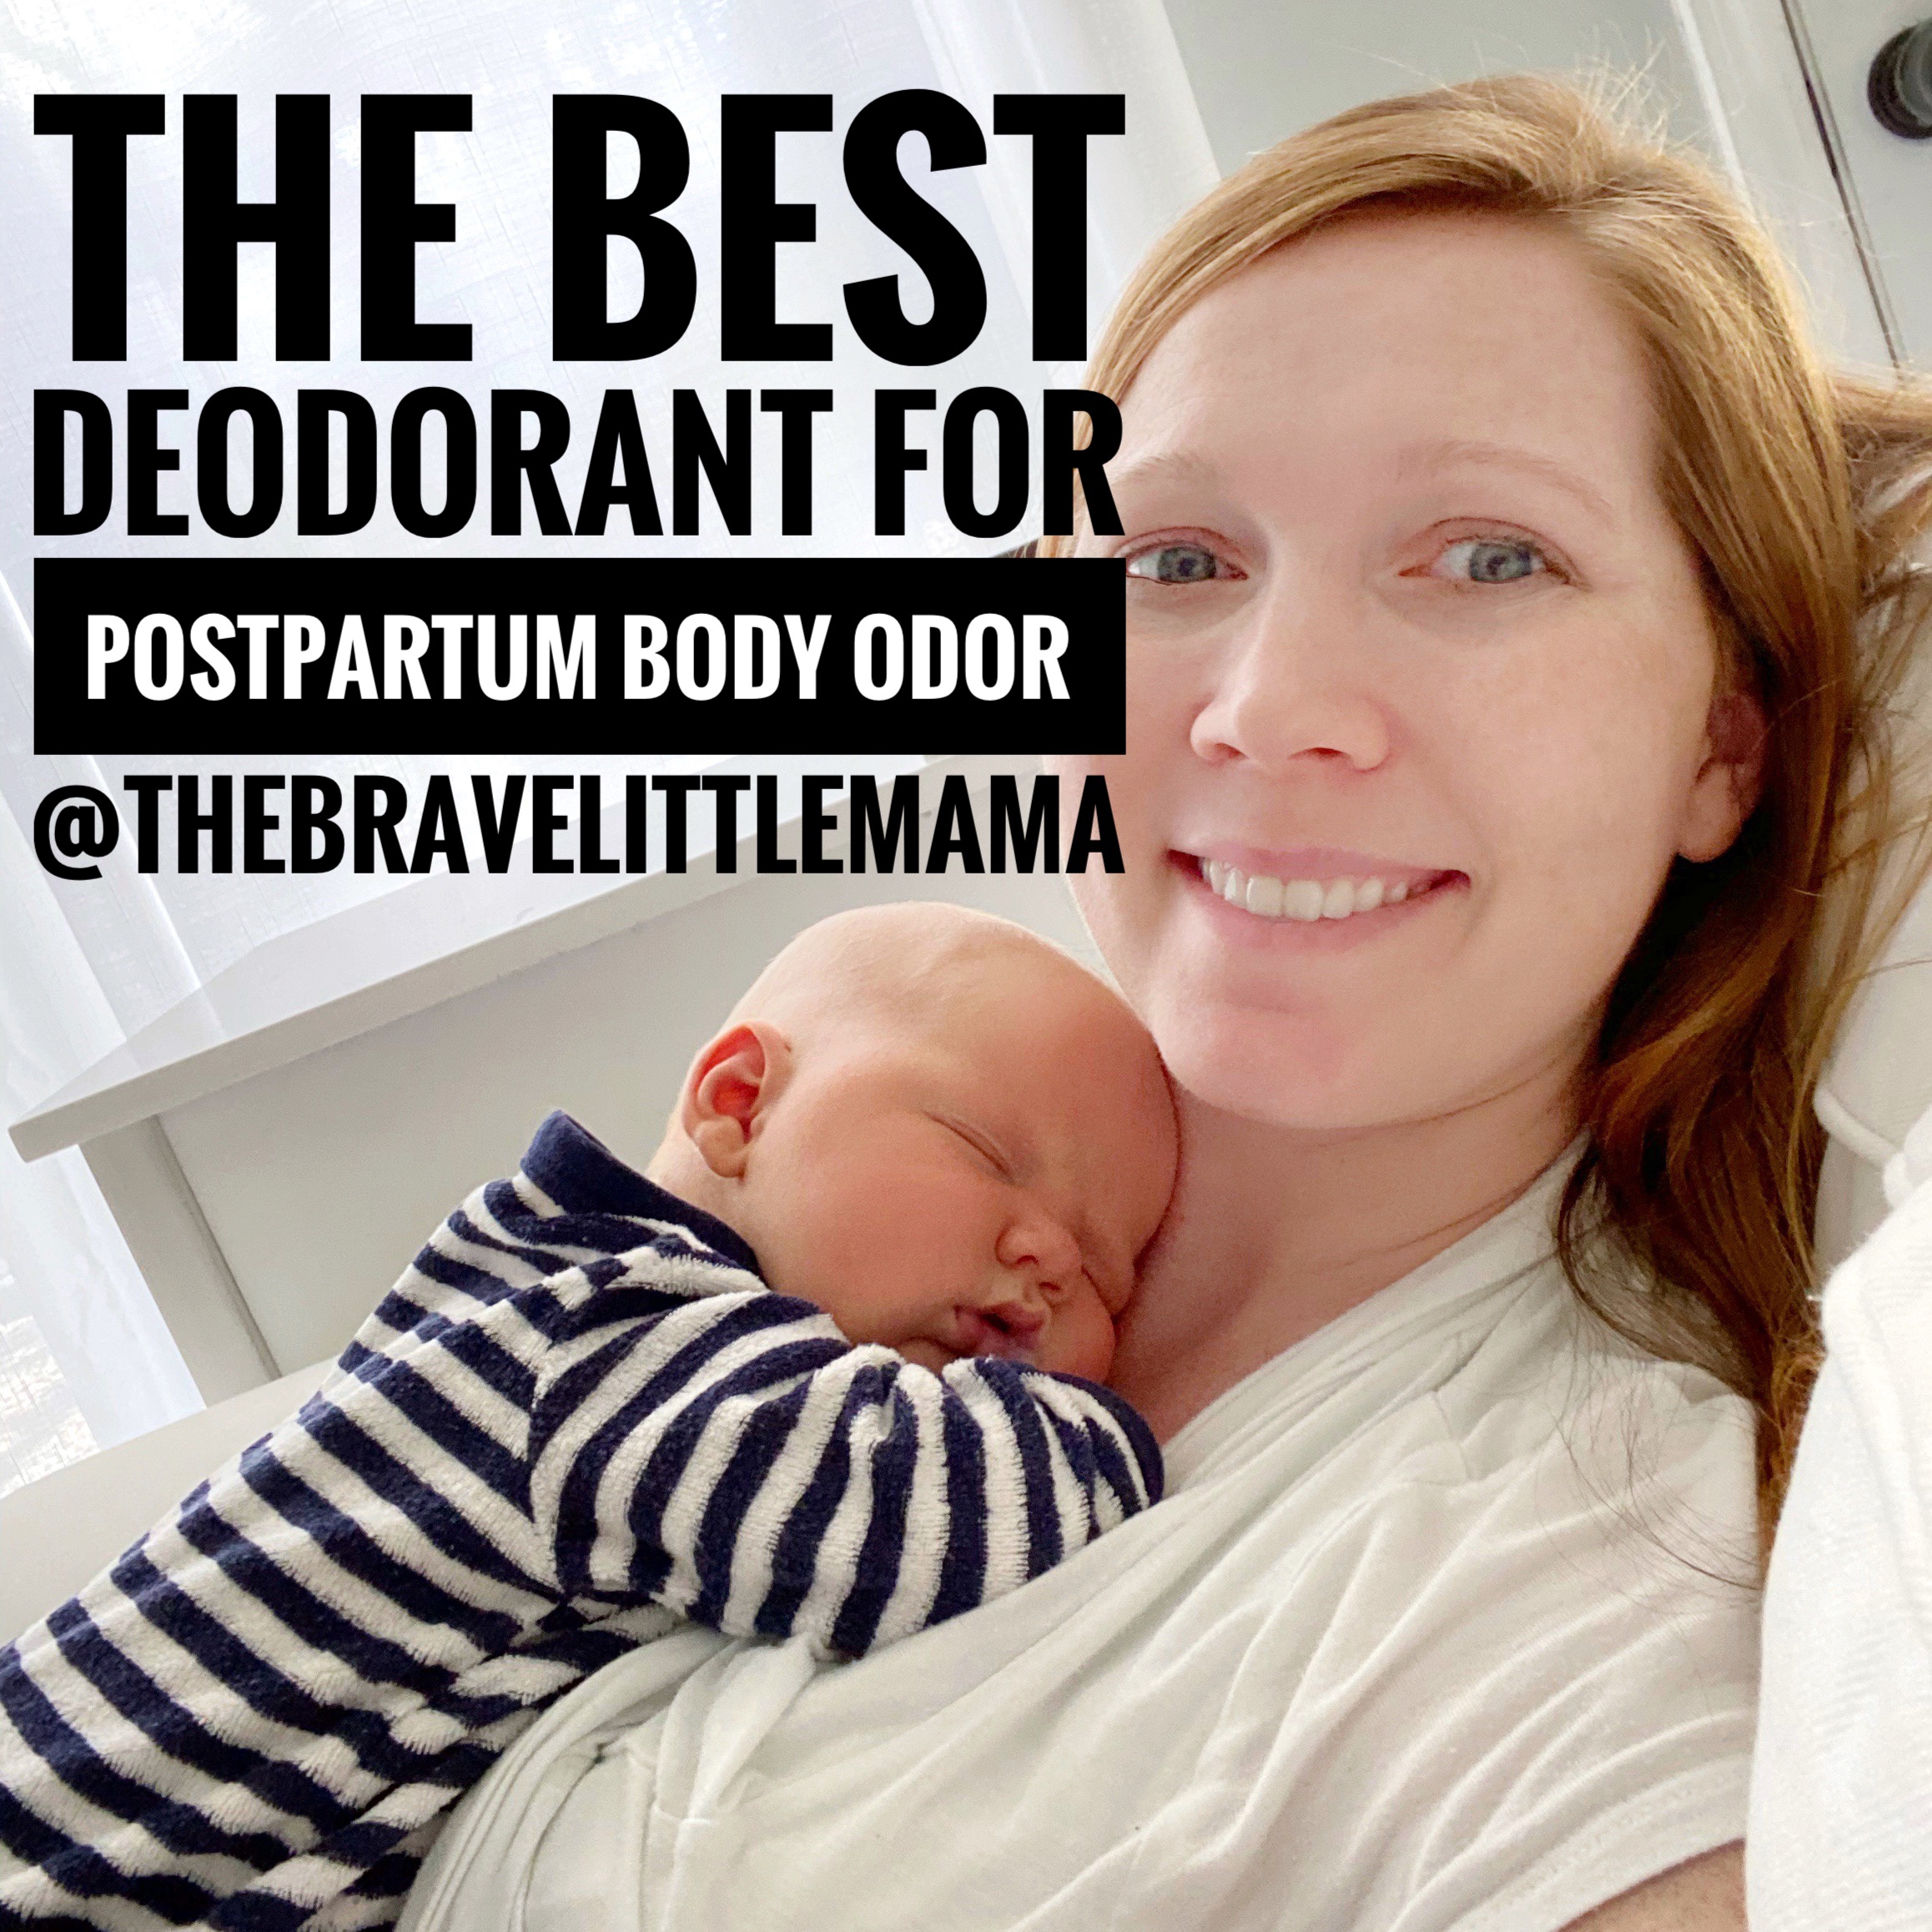
Everybody warns you about the lack of sleep and endless crying you may encounter when your baby arrives. But nobody and I mean not one single person gave me a heads up about postpartum body odor. Postpartum hormones do some wild things to our bodies and funky postpartum body odor (from literally doing nothing but sitting on a couch in the air conditioning) is one of those things.
This post contains affiliate links. See affiliate disclosure here.
Nobody likes to be stuck under a sleeping baby while you are smelling your own postpartum body odor. It stinks. Pun intended. I went on the hunt for a deodorant to help with this problem. I had a few criteria I was looking for:
Must Actually Work
All Natural Ingredients
No aluminum
Long Lasting Results
Pleasant Smelling (I hate the smell of most deodorant)
No baking soda
Cruelty Free
I really wanted to find something that would work, but was not willing to use anything that could potentially contain toxic or cancer causing ingredients. Something with its own gross smell or something that I would have to reapply multiple times a day to continue to see results was also off the table. I have very sensitive skin, so baking soda could not be an ingredient as it causes lots of irritation.
Lume has a pretty cool back story. It was created by on OB/GYN who wanted to help give her patients a better solution to their body odor issues. She discovered that a lot of body odor is caused by the bacteria on our skin digesting bodily fluids. Gross but this allowed her to formulate a better product. Instead of trying to mask the smell, Lume prevents the smell. Lume can be used anywhere on the body that smells.
Since day one of trying Lume, I have been hooked. It works well and continues to work for a long time. So when I don’t have time to shower for a few days, because the baby won’t let me put him down, I still don’t stink. It is a GAME CHANGER.
It comes in 5 scent options- Unscented, Jasmine Rose, Juniper Berry, Silver Spruce and Lavender Sage. And two container options- a typical deodorant type container and a squeeze tube. I got the Lavender Sage scent in the typical deodorant style container. It smells amazing and is super easy to apply.
With other deodorants, a more is better approach always seemed best. With Lume, you only use a little bit to lightly cover the skin. If you can see excess product, then you used too much. My husband tried it after I told him how much I liked it and he immediately made the switch. In conclusion, Lume is awesome. Lume is the solution to your postpartum body odor worries.
If you are like me and sometimes forget to apply deodorant before leaving the house, get the two pack so you can have one at home and one in your car or at work! You will never be stinky again!
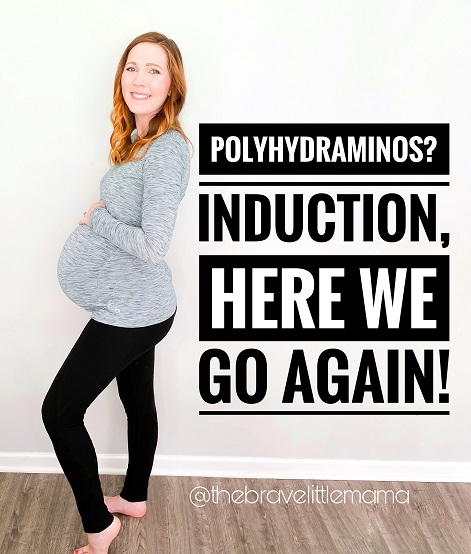
I first wrote about my experience with Polyhydraminos (high level of amniotic fluid) and induction with my second pregnancy. At the 39 week mark, my amniotic fluid levels were measured at 28cm. My doctor decided that we would induce labor that day. You can read about that induction experience here.
Fast forward to my third pregnancy.
Like my two pregnancies before, I had a normal, low risk pregnancy. However, this was my first pregnancy in which my baby wasn’t head down immediately. At the 28 week mark, my OB used a handheld ultrasound to confirm my suspicions. My baby was in a transverse (sideways) position in my belly. Until the 36 week mark, most OBs don’t get concerned with how baby is positioned . Still, I wanted to go ahead and do what I could to get baby re-positioned. I didn’t want to risk baby staying transverse and making it so that I would have to have a c-section.
I started with all the spinning babies techniques. Then added acupuncture. And then my chiropractor started using the Webster technique. I also tried every trick I could find on Google. Playing music at the bottom of my belly, putting an ice pack on his head and a heating pad at the bottom of my belly. I’ve lost track of all the different things I tried. When my 36 week ultrasound showed that baby was head down I was SO PUMPED !
Attempting to FLIP that BABY!
At that same 36 week ultrasound, my amniotic fluid levels were still in normal range (18 cm). My OB still wanted to make sure that they didn’t go up at the end of pregnancy like they did with my previous pregnancy. She planned to recheck with a 38.5 week ultrasound. 10 days later, I returned for another ultrasound and my levels had risen to 25.75 cm. My OB determined that like before, we would proceed with an induction.
The Waiting Game
Unlike before, the hospital I would be delivering at had a long wait list for induction patients. My ultrasound appointment was on a Wednesday. My OB wanted me to wait until the following Sunday, when I would officially be 39 weeks before proceeding with an induction. Friday, the induction scheduler at my OB practice called to let me know that Sunday was booked. If for some reason an opening became available they would call me. Otherwise, she would touch base again on Monday.
The weekend came and went. No call. No induction. Monday morning I got the call that I was scheduled for 7:30 pm that night. 5:30pm rolled around and the hospital called to say that they were too busy. My induction was again rescheduled. Now it would be Tuesday morning at 7:30am. Tuesday 5:30am rolled around and they called to again say that they were too busy. I could call back in a few hours and see if they could take me.
Tuesday didn’t happen. Wednesday morning, the induction scheduler at my office called again. The hospital was still very busy with other laboring mothers. They were now ranking their medical induction patients based on risk and I was 5th on that list. They recommended I go ahead and schedule my 39 week visit just in case I didn’t get to be induced for the next few days. I was pretty frustrated and defeated after spending the last 4 days thinking it was “baby day” only to be left hanging.
Thankfully, I was able to get in with my OB that same day. She was just as frustrated as I was that the induction process was so delayed. To cover our bases, she wanted to do another ultrasound to see where my fluid levels were at since it had now been a week since we last checked. They again, had risen. Now they were at 29cm. In an effort to get my induction ball rolling, my OB called labor and delivery to offer to place the Cook catheter in office, so that it would already be in place if they would allow me to come in that evening to be induced. They agreed to the plan.
Its Baby Time
My OB practice has 3 locations, and the location we were at, wasn’t stocked with the Cook catheter that was needed. If I haven’t already mentioned how much I LOVE my OB, let me tell you. She is the best. Instead of saying too bad, she offered for us to drive to the other location, after hours, so that she could place the catheter so that I could still get my induction started that evening. So that is just what we did. It was after hours, so Rob got to play nurse and had the role of pushing the saline syringes that were used to inflate the catheter balloons. My Cook catheter was placed. at 6:45pm.
Induction in the time of COVID 19
We left the office, picked up some dinner and then headed to the hospital for our 8pm check in. The check in process was smooth. We had our temperatures taken and answered a few Covid 19 screening questions. We went to Labor and Delivery and were then placed into a triage room. In that room, my IV catheter was put into place and I was tested for Coronavirus.
The hospital was still very busy, so while the plan was to move us to a L&D room once my Coronavirus test came back, they did not have a room available. On the bright side, the negative test result meant that I was done wearing a mask whenever the hospital staff were present. The Cook catheter was clearly doing its job because I was having a lot of regular contractions at this point. The room was very cramped and I was having a ton of back contractions.
Since a room was still not available, they decided to move me to a postpartum room instead. This would give us more room and would allow Rob somewhere other than a little chair to sit or lie down. Once in this room the plan was that I would rest as much as possible until either a room became available or the Cook catheter came out. Along the way of moving from one room to the other, my contractions changed- barely painful and no more back labor. We thought this was a good sign that I would be able to get some rest since it was midnight and I was tired.
Before attempting to sleep I decided to try and pee and while doing so, my Cook catheter came out. I rang the nurse, who then paged the doctor. The doctor came in to check and I was 6cm dilated. So after 20 minutes in the postpartum room, I was finally on my way to Labor and Delivery.
Labor and Delivery, Here I Come
Once I got there, I was told that part of the “too busy” issue was not that they did not actually have the physical rooms available, but that they did not have enough staff to cover all of their rooms. I got all hooked up to the monitoring machines. I still wasn’t really feeling the contractions, but according to the machines, they were still coming regularly. My epidural wore off during pushing for my first baby, so I knew I did not want to birth a baby again without one.
The nurse got me started on an IV and I napped while waiting for the anesthesiologist. The epidural was placed and then I went back to sleep. My nurse used one of those peanut balls to position me on my side. After a few hours, she came in to adjust me to the other side. But baby’s heart rate immediately started to decline, so she quickly flipped me back. Thankfully his heart rate immediately recovered.
At some point in the morning (I forgot to check the time), the on call OB came in to break my water, with the hope that it would help me progress since I was still at 6cm dilation. She broke my water, and then I went back to sleep. Looking back, I wish that I could go back to this moment and do it differently.
Around noon, we decided to check my progress as the doctor was considering adding pitocin if I was still not progressing. Little did I know, shit was about to get real. My nurse did her check and from her facial expression I knew something wasn’t right. She went to get the doctor who quickly came in with an ultrasound machine.
After a quick ultrasound, she confirmed that at some point during labor, my baby had flipped and was now in a breech position. I was 10cm dilated and his little butt was descending into my birth canal. She recommended an immediate emergency c-section. Immediately, I started sobbing. I don’t mean that subtle and quite type of sobbing. I was full on sobbing.
The OB went through a long list of risks and benefits of both attempting a breech vaginal birth and for moving forward with the c-section. I’m not sure I even heard most of what she said. I heard lots of concerns about death to baby, death to me, having to cut anything to get baby out if he were to get stuck. No thank you, I didn’t want a c-section. I didn’t want to risk baby getting stuck or want my cervix or bladder to be cut to get baby out. Making any decision was 100% not what I wanted to do. I didn’t want any of this to be my birth experience.
I felt paralyzed (and not just from the epidural) and unable to make a decision. My brain was running through a ton of thoughts- thoughts of how many women successfully birth breech babies, how many women die in c-section surgery, weighing all the risks and all the benefits. But I knew that as much as I wanted to try for a vaginal birth, the risk of something going wrong and my baby being hurt or dying was unacceptable. I could not risk his life because of fears for my own self, I would never be able to forgive myself if something happened to him. After giving verbal and written consent and I was rolled into surgery- still sobbing my eyes out.
Ready or Not, Here I Come
Being rolled into surgery was a strange experience. The room was filled with what seemed like a dozen people. A surgical team, a team for the anesthesia and a team to take care of baby once he was out. The anesthesiologist explained everything to me and asked that I tell him how I was feeling throughout. My IV catheter that had been placed earlier in the triage room was slightly positional, so with every new injection, my arm hurt. Looking back, I wish that I had asked for a new one to be placed. But I was still sobbing and could barely think beyond how scared I was and how much my arm hurt. Rob, my husband, held my non-catheter hand and kept telling me that everything would be okay and that he loved me.
I could feel movement in my abdomen, similar to how when your leg is asleep, you can slightly feel the pressure of your hand touching it, but there is no pain. I could hear when my baby was born and I could see him when they took him to be weighted and checked out. After an hour of sobbing and surgery, I was emotionally numb. I have never been one to cry when my babies are born, but I definitely felt more emotionally removed from the birth than with my other two babies. I felt like I needed to nap for a week.
Callen Kirk – born at 1:18pm
Once my incision site was closed, my OB came to my side of the curtain to tell me that she was able to complete the surgery with only the traditional horizontal cut (she had been concerned that a vertical cut may be needed give how low in my birth canal baby was) and that she had done a super stitch which would make me a great candidate for a VBAC should I choose to have additional children.
We then went to the recovery room where they monitored my bleeding. I was told that I needed to start regaining feelings in my legs before I could be moved to my postpartum room. My bleeding was a little heavier than my nurse liked, so I was given additional IV fluids. After a few hours, my legs were still fairly numb so we stayed in the recovery room longer than expected. Once some feeling started to come back, we were off to our postpartum room.
Finally getting skin to skin time while in recovery.
I spent 39 weeks anticipating his delivery and in those 39 weeks, it never crossed my mind that I would actually end up with a c-section. Even when he was transverse in my belly, I never actually thought that I would end up with a c-section. To say that I was disappointed would be an understatement. I was and to some degree am still devastated. I have spent so many moments replaying my time in the hospital in my head. Questioning if I could have changed the outcome. If only we would have checked his position before we broke my water. Or if I would have been induced days earlier before my fluid levels got so high and gave him extra room to flip. The what ifs go on and on.
I felt like a failure when I agreed to the c-section. I could barely even talk about what happened during his birth without crying for the first few days. The first time I saw my incision after the bandage was removed, I cried. I felt like my body had been mutilated. It has almost been 4 weeks since Callen was born. I would be lying if I said that I was past all of my feelings of disappointment. But I am thankful to have my sweet baby in my arms, even if his birth didn’t go how I planned.
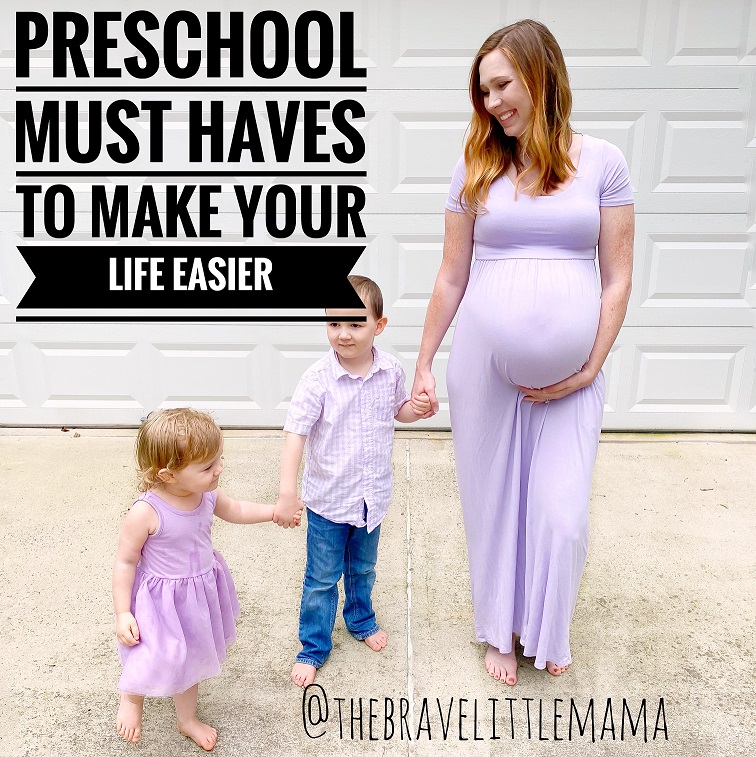
My son went to daycare for years, so when he started preschool I wasn’t overly emotional. It may just be the pregnancy hormones but having my daughter start preschool in the fall after being home with me for two years is making this mama feel all the feels.
I know that she is going to thrive in the environment our church preschool offers, I am just not ready for my baby to grow up.
I am expecting a new baby in June, so I am trying to get everything we will need in the fall prepared now so that it will be one less thing to worry about later.
Our preschool runs a half day program that involves each child bringing their own lunch each day. Every child is also required to have extra clothes available in case of accidents. It isn’t a surprise that with all the kids that attend the school, they ask that everything be labeled.
This post contains affiliate links. See affiliate disclosure here.
We have tried a lot of different products with my son and here is what we have found to work best:
Inchbug Orbit Labels for water bottles
On the bottle itself is a silicon band that has our daughter’s name on it. InchBug has a bunch of colors and design options. They come in a pack of 4 so we can easily have multiple cups labeled for her. These bands can also be used on snack cups.
Name Labels to label ALL THE PRESCHOOL THINGS!
Pretty much everything that we send to school is required to have her name on it. I like to keep a pack of name labels handy so that I can quickly and legibly label things for her. Name Bubbles has a great multi pack that comes with a bunch of sorted sizes. I haven’t used these exact labels from Name Bubbles, but I have used others they make. There are a ton of fun designs that you can choose between. These labels are also dishwasher and steam sterilizer safe. Use this link to save $5 off your first order from Name Bubbles!
Allergy Alert Labels for Preschool Peace of Mind
My daughter has a dairy allergy which makes me even more nervous about her going to preschool. There are a bunch of great options on the market for us. Here are some of my top picks:
Name Bubbles Allergy Alert Labels-
These labels include your child’s name and you can then customize what the alert says. These would be great in the event that your child has multiple allergies or if you also need a name label. Use this link to save $5 off your first order from Name Bubbles!
Inchbug Allergy Alert Labels-
Inchbug has two options for allergy alerts. One with a name option and one without. These labels are definitely a cuter option and allow for a more customized look.
No Iron Name Tags for Jackets-
These are one of the most recommended items I have gotten from my readers. Save time, mess and effort apply these no iron kids daycare labels directly onto the surface without bothering with an iron. Name labels are water resistant and durable enough to withstand multiple washing machine and dryer cycles!! Find them here.
Bentgo Lunch Container
My favorite lunch container for packing lunches in is the Bentgo Leak-Proof, 5-Compartment Bento-Style Kids Lunch Box. It makes it so easy to pack a bunch of kid friendly items and even has a little compartment that is perfect for dip. This lunch box also comes in six fun prints option that includes unicorn, rocket, mermaid and shark.
My son is very proud of his Bentgo and loves to get to help pick what he will be eating at lunch each day he goes to school.
Lunchbox for Preschool
If you are packing anything that needs to stay cold, you will need an insulated lunchbox to hold your Bentgo container. I splurged with my son and bought him a Pottery Barn Kids lunchbox and I was disappointed. The Bentgo barely fits even though other reviews said it would fit well. With my daughter we are saving money and getting a cheaper option off of Amazon. Wildkin offers a ton of prints for girls and boys and fits the Bentgo container much easier.
Flat Ice Pack
While the Bentgo container will fit into a lunchbox, it doesn’t leave a ton of room for an ice pack. Thankfully there are a ton of thinner ice packs on the market. This one is top rated. Pro-tip: make sure to put your name on your ice packs. We lost a few before we started doing this.
Water Bottle
I am a sucker for matching items, so Adalyn’s primary water bottle for school will also be from Wildkin so it can match her lunchbox. Their water bottles are made from ultra-durable, stain-resistant, and taste-free Tritan plastic. Free of BPA, BPS, and BPF, you can feel comfortable giving your child Wildkin’s Water Bottle. It has a shatter resistant design.