The Brave Little Mama

My Husband Doesn’t Help Me: A Challenge

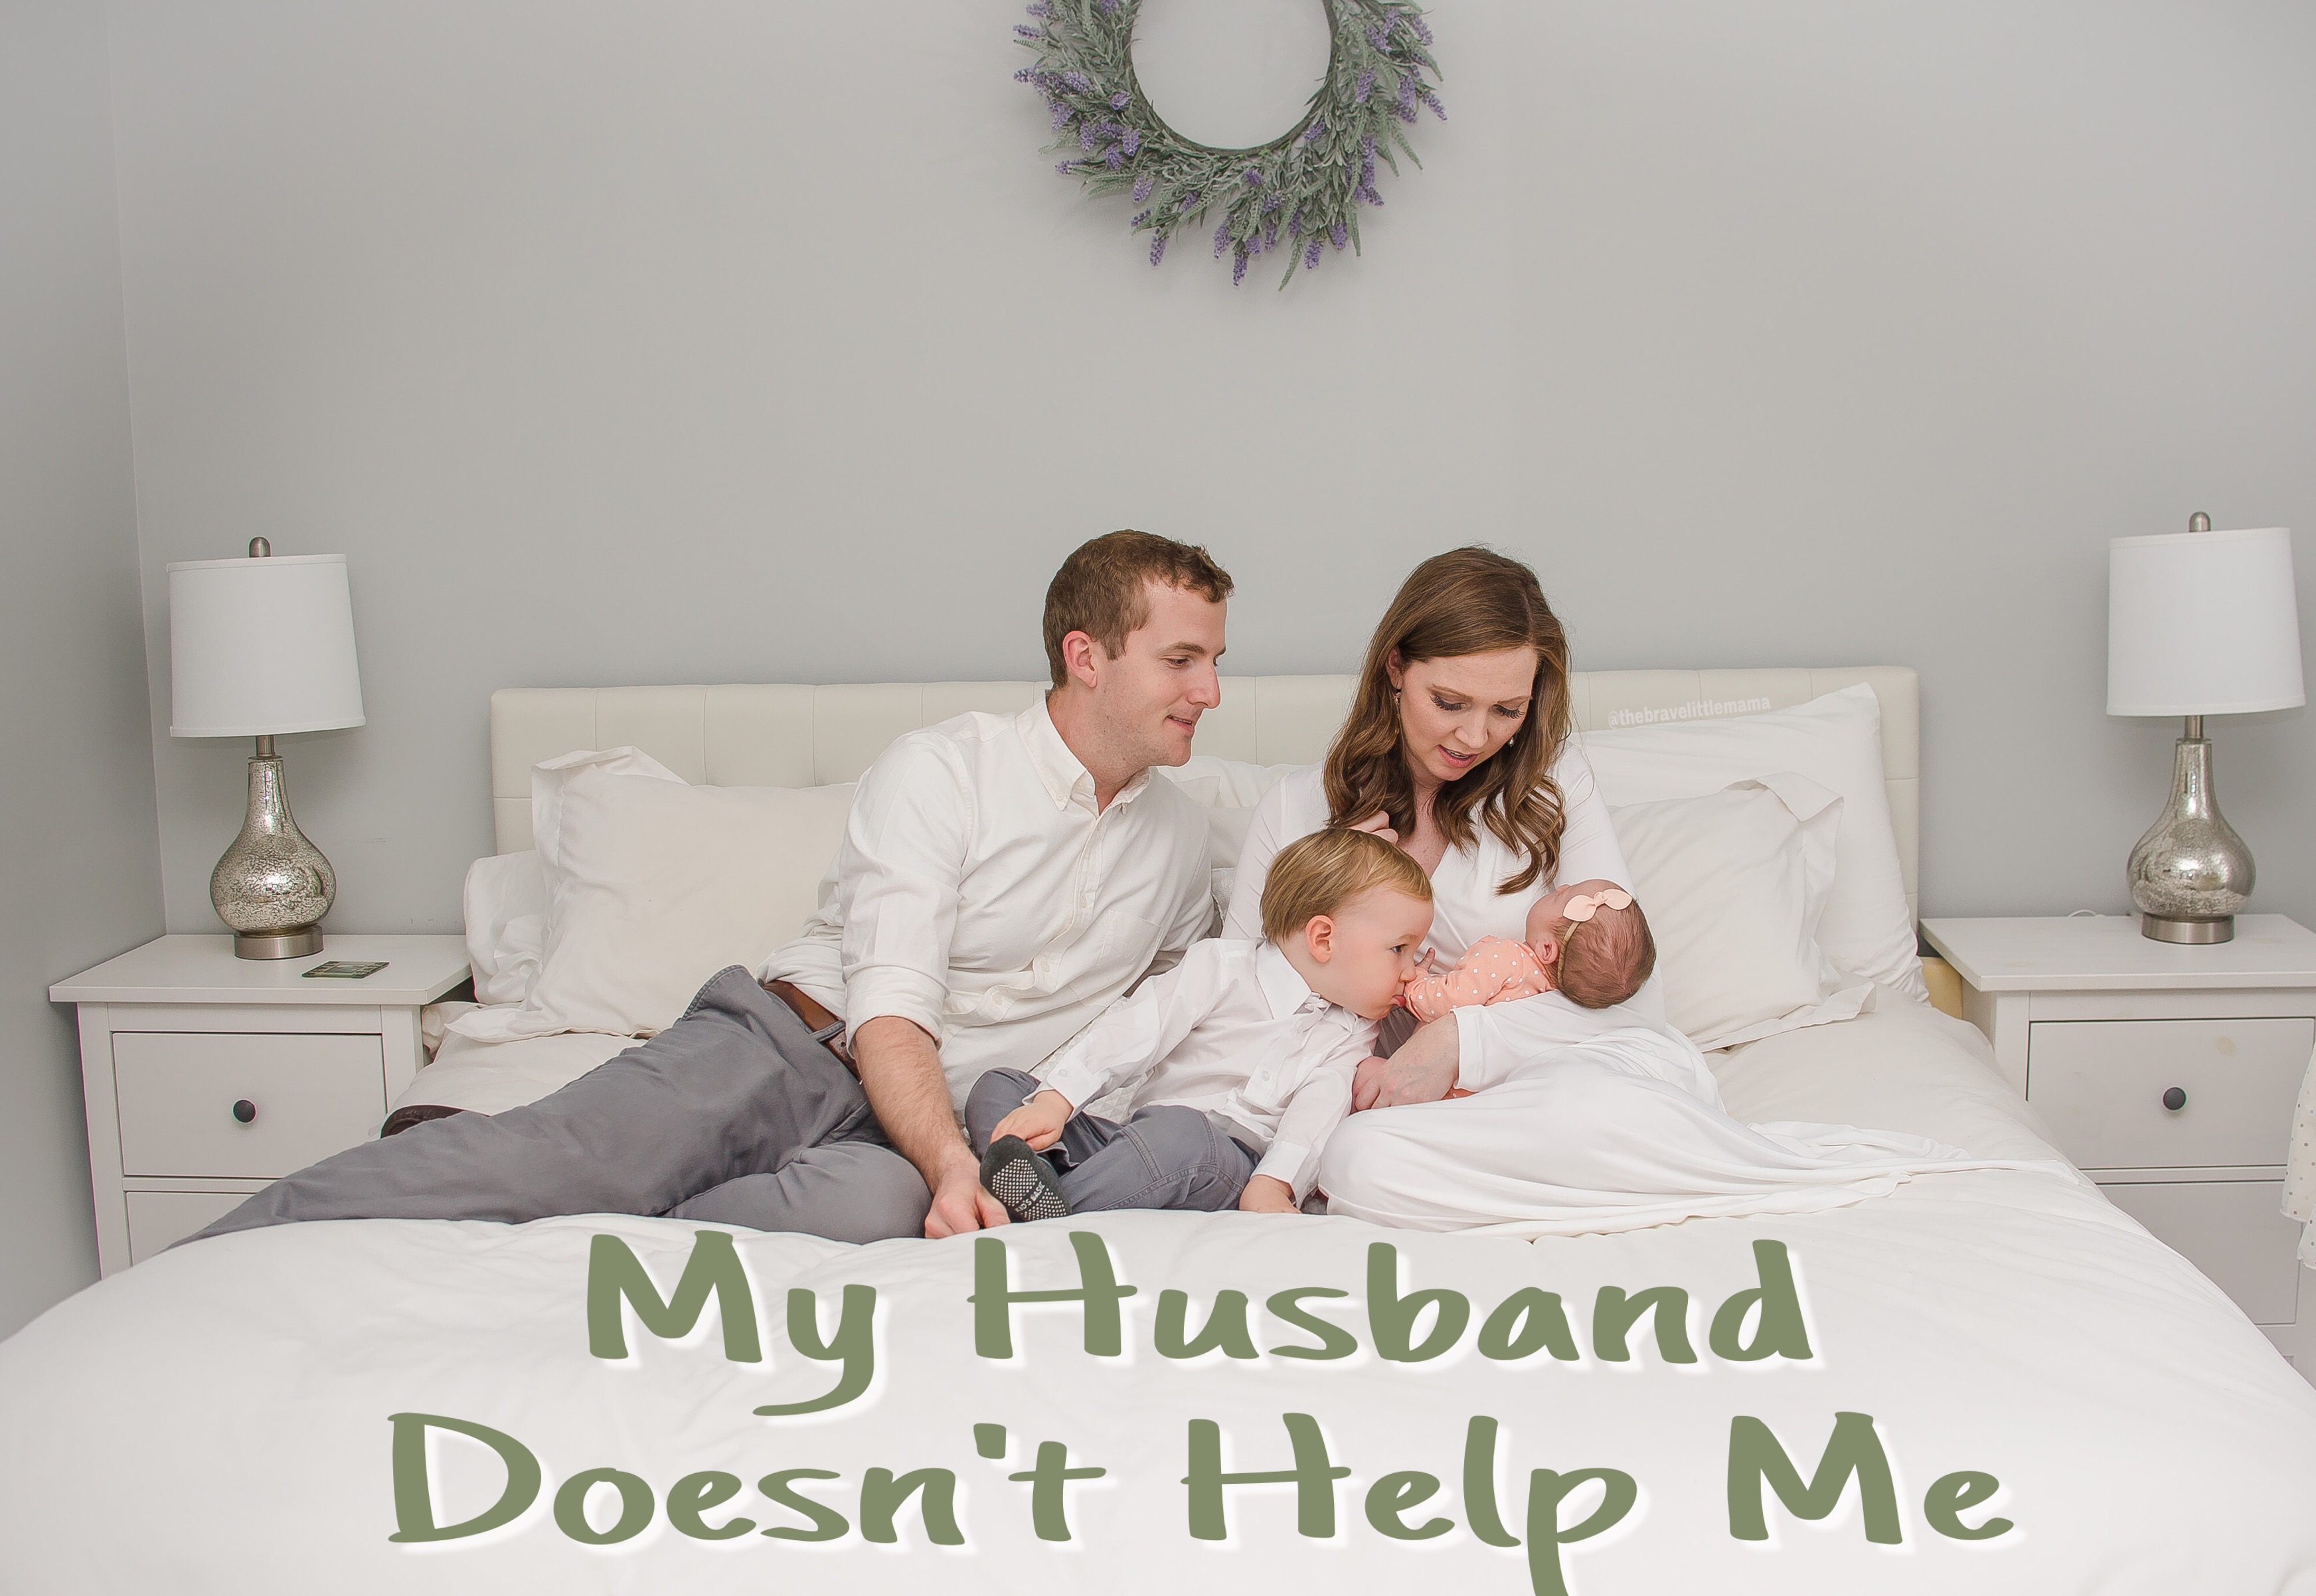
The other day I was getting lunch with a few fellow mamas.  We each had at least one kid in tow, so our public lunch was quite the spectacle. In the conversation that we were able to sustain between the tantrums and random crying we got on the topic of who does what in each of our relationships. Who does the laundry, the dishes, makes the bed or vacuums.  Who bathes the kids, who tucks them in at night and so on. I realized that all of us, myself included, kept referring to our husband’s efforts with the qualifier of “he helps” before everything we stated our husbands did.  I started getting annoyed with myself for talking like this because my husband doesn’t “help” me.

My husband doesn't "help" me

Using the word help implies that all of these tasks are mine to do and that my husband is making it easier for me by offering his services. Our marriage is a partnership.  We are together working towards the same goals. Financial goals.  Cleanliness goals. And the goals that we have set for raising our babies. He owns and lives in this house with me, so he should also clean the house.  He eats food on our dishes in the house, so he should also cook and clean those dishes.  The children are his children, so he should also provide care for them.

My husband doesn't "help" me

I got lucky in the husband department. My husband cleans and folds his own clothes, our towels and our bedding each week.  He unloads the dishwasher each time that it is run, early in the morning before I even wake up. On Fridays, he vacuums all of the floors and even uses the wand to get the edges between the floor and the walls.  He makes our bed in the mornings.  He wakes up our toddler and gets him ready for daycare while I do the same with our new baby.  At night, he tucks Riley into bed, while I nurse Adalyn to sleep in the other room. He mows the lawn each week and gets the mail every afternoon. Your husband may do more, or he may do less and that is okay.  Each marriage has to find a balance that works best for both individual involved.

My husband doesn't "help" me

By referring to my husbands efforts as him “helping” me, I am belittling his actions. I am making it sound like everything that he has done, was done because I asked.  As if he couldn’t have figured out on his own that our child needed to eat or needed to have his diaper changed.  My husband is fully capable of determining these things on his own.  Referring to my husband as helping me also implies that he is in some way doing me a favor by completing these actions. Don’t get me wrong, I really appreciate him doing all these things, BUT he isn’t doing me a favor by being an equal participant in our life.

So I challenge myself and I challenge you.  Stop referring to everything your husband does as “helping” you.

8 Tips to Make Your Pumping Routine Easier

I am going to let you all in on a little secret… pumping sucks. When my son was born, I was on a mission to breastfeed to at least a year, and nothing was going to stop me. My twelve week maternity leave came to an end and I was shocked at how much I hated the entire process of pumping.  Carrying everything I needed to work was difficult. Storing all of my pump parts was a pain. Washing all those parts at the end of the day was such a strain on my husband and I.  During my 14 months of pumping at work for my son, I picked up a few tricks to make the daily routine more manageable.

Invest in a Pump Bag

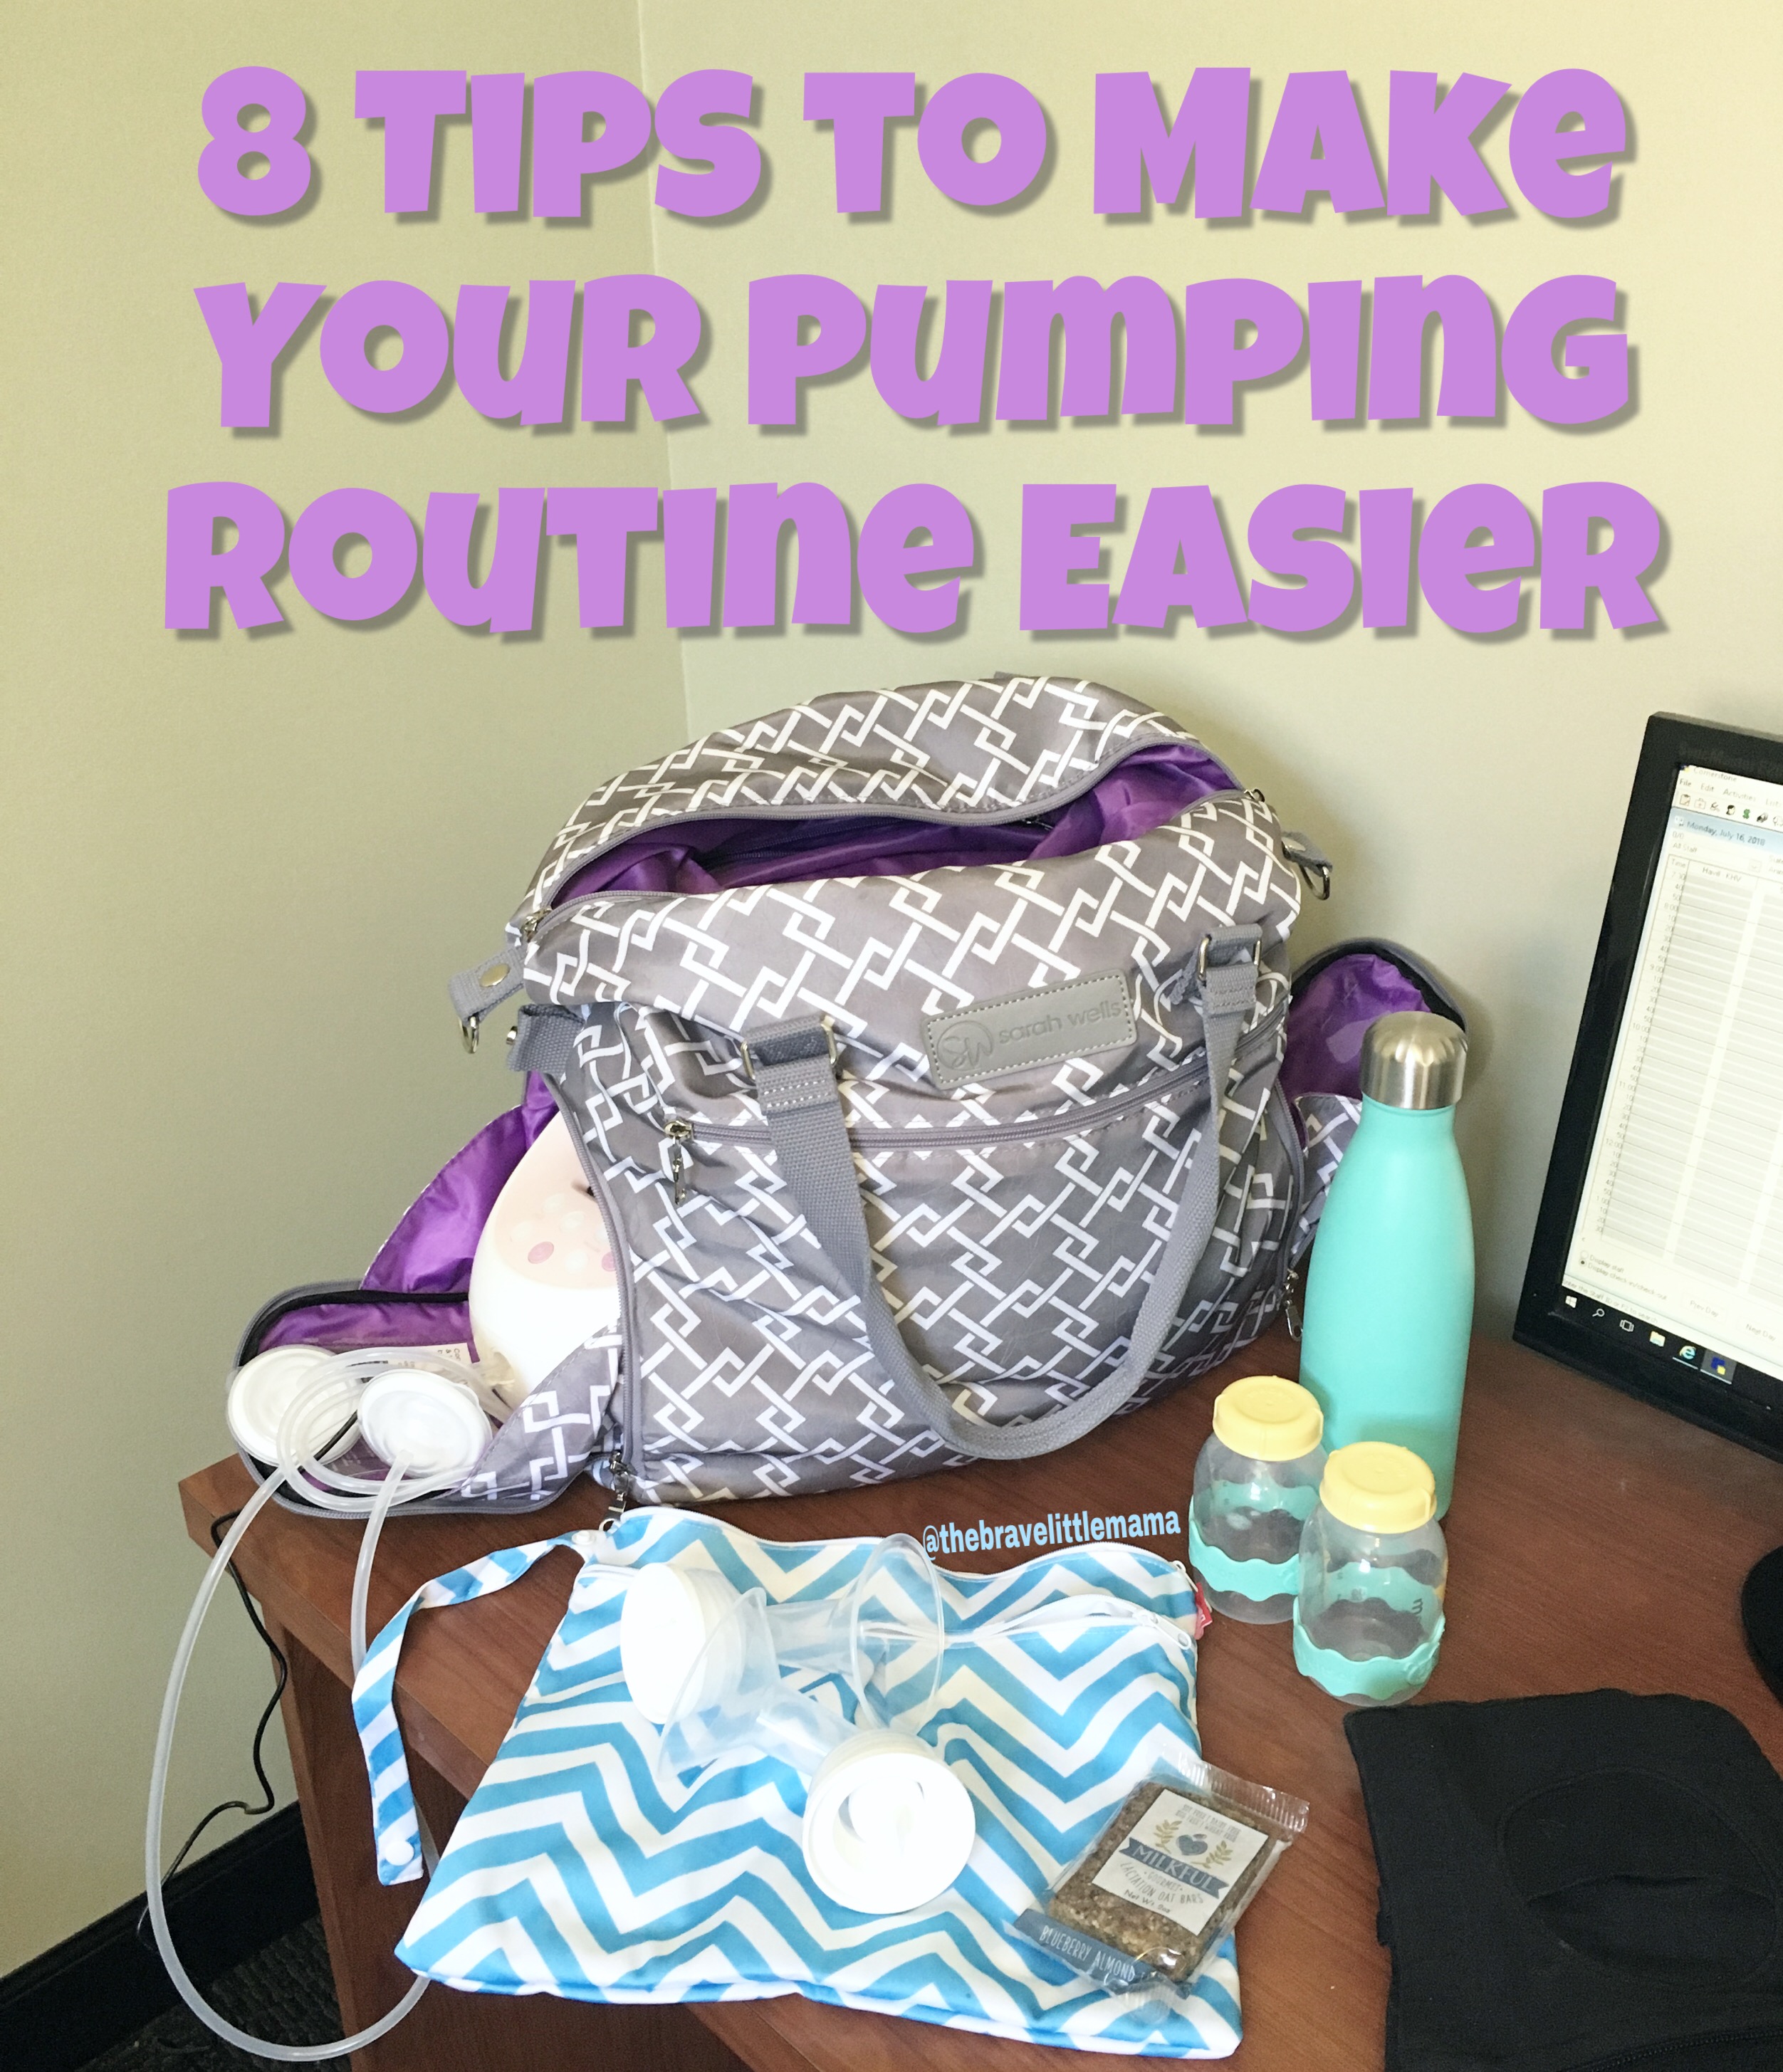
When I first started back at work, I would carry my purse, a lunchbox and a tote bag with my pump.  I looked and felt ridiculous. At the three-month mark of pumping, I figured that there HAD to be a better option out there. Thankfully, there was! I discovered Sarah Wells’ pump bags and have never looked back!  I am currently on baby number 2 and am using this Sarah Wells’ bag.  It has two insulated pockets on the sides.  I fit my Spectra S2 pump and parts on one side and use the other side for an ice pack and 4-5 5oz bottles.  In the main compartment of the bag I can easily fit my wallet, 1 bag filled with snacks, a cosmetics bag, my lunch and an insulated water bottle.

I make milk.  What’s your superpower?

Use a Hands Free Pumping Bra

These allow you to have free use of your hands during your pumping sessions.  Need I say more?  There are a bunch of different options out there.  I prefer the Simple Wishes hands free bra, because it has a huge range that it can be adjusted. Compared to other hands-free bras that I tried, I also found that this one held its shape and didn’t get floppy over time.

Rinse And Refrigerate Your Pump Parts Throughout The Day

In between pumping sessions, you can store your pump parts in the fridge and reuse them for your next pumping session.  Just give them a quick rinse to remove any milk after your pumping session. Full disclaimer, sometimes I don’t even rinse them and just stick them into my wet bag. This will save you space in your bag from needing to bring another set of pump parts. It will also save you time from having to fully clean the pump parts after each pump session.

Pump Into The Bottles You Will Be Sending To Daycare

pumping

Pumping into bags may take up less space in your bag, but unless you will be freezing the milk, you are making more work for yourself later on.  If you pump directly into the bottles that your baby will be using tomorrow, you will save so much time prepping bottles once you are home. You can read about my daycare bottle set up here: The Best Way to Label Daycare Bottles

Keep a Spare set of Pump Parts at Work

This is a lesson that I learned the HARD way.  I was already 20 minutes behind my pumping schedule, my boobs felt like they were going to explode and surprise, no membranes for my pump. There is nothing, I repeat, nothing worse than going to pump and discovering that you are missing parts. Balancing work and motherhood is hard enough without having a mid-day crisis.  Do you attempt to hand express? Do you leave work and go home to pump? Learn from my mistake and have a spare set of parts at work as a back up. I use the Spectra S2 pump and found that these spare parts from Nenesupply worked just as good as the original parts! I recommend having 2 spare sets- one for work and an extra set at home.

I used to POP bottles and now I PUMP them!

If You Can, Leave Your Pump At Work

If you don’t utilize your pump at home or on the weekends, then there may not be a need for you to ever bring it home.  My Spectra S2 weights 3.3 lbs.  That’s a lot of extra weight to lug around when you consider all the other things that are also in your bag.  If you do use it on the weekends, but not during the night, you can also leave it at work during the week and just bring it home for the weekend.

Use Machine Washable Wet Bags To Store Your Pump Parts Between Pumping Sessions

I have seen and tried a bunch of different options for storing my pump parts throughout the day.  Tupperware is bulky in my bag and is not at all discreet sitting in the work refrigerator. Some bags specifically made for pump parts have to be hand washed and hung dry. I found this to be a pain in the butt during the week. Plus, those bags usually cost more. My perfect solution is machine washable wet bags.  At the end of the week, they get washed and are ready for the next week. Having a bag ready to go the night before also helped by making it possible to pre-pack my pump parts the night before. The bags I use each have 2 compartments, so I can use each bag twice (one day in each compartment). At the cost of 2 for $8 on Amazon, they are extremely affordable.

Invest in a Bottle Sterilizer

I stumbled across these while pregnant with my second baby and I am still mad that I didn’t have one while pumping for my first.  With my bottle sterilizer, I now only have to lightly rinse my bottles and pump parts.  They then go into the sterilizer and 45 minutes later they come out completely dry.  Every day we save at least 10 minutes that used to be dedicated to cleaning bottles and pump parts. I also love the fact that each and every day my pump parts are actually sterilized, not just washed. I can fit 6 bottles and my pump parts in this sterilizer. We purchased from Amazon and my husband refers to our bottle sterilizer as the best money we have ever spent.

I hope these tips help make your pumping journey better!  Happy Pumping!

Want to speed up your routine of prepping bottles for daycare?  Check out my blog: The Best Way to Label Daycare Bottles!!

This post contains affiliate links. See affiliate disclosure here.

Confessions of a Former Judgmental Mama

When I got pregnant, everyone told me about all the “unwanted” advice I would be getting and how I would definitely hate it.  The advice started rolling in and I realized that I really didn’t hate it.  I was so hungry to know all the things about babies.  And not just the things, but the best things.  What car seat was best.  What brand of diapers were the best. Sleep training? Crib vs. Bassinet? Breastfeeding vs. formula feeding?  I wanted to know all the factual information that was out there so that I could make the best choices for my baby.

I found out pretty quickly that there are exactly 3.8 million different decisions that you will make in just the first six months.  And to make this whole motherhood thing even easier, there are so many judgmental people out there that will make you feel like crap about your decision. It turned out that I would be one of those judgmental people.

When my precious baby boy was being born I had an epidural.  Gasp.  So I already had a strike against my “perfect mommy” standing right out of the gate.  Did it matter that I was not progressing after 34 hours of labor?  Did it not count for something that, I dilated the rest of the way immediately following my epidural being placed?  Nope and Nope. I had failed the first challenge of being the perfect mom.

When Riley was born, I was dismayed to find that he couldn’t latch on his own. Our breastfeeding relationship was saved by nipple shields, my extreme oversupply and my overactive let down that essentially drowned him in milk with little effort on his part.  But we survived the countless nights where breastfeeding wasn’t working. He couldn’t latch and I couldn’t handle my inability to properly latch him. We survived him having an undiagnosed tongue and lip tie. We pushed past countless clogged milk ducts and two rounds of mastitis. Breastfeeding with a nipple shield made me feel like a failure.  I didn’t tell most people about my struggles.  Everyone else just saw a happy mom that was still breastfeeding her baby. Just like a good mom should.

As Riley got older, I continued to make decisions that to me were based in factual data.  Children are 500% safer rear facing, so by gosh, Riley will be rear facing until he is a teenager.  Eating sugar can drastically disrupt a child’s sleep patterns.  Message received, no added sugar for him.  Ever.  Many children suffer from constipation and dehydration.  Looks like Riley will be eating fruit and other fibrous foods all day, everyday.  My husband and I made these decisions for Riley and for the most part, he didn’t give us any push back.

I never planned on being a judgmental mom, I don’t think any of us do. But the first time I saw a friend with their forward facing 13 month old child, I totally judged her.  When another friend quit breastfeeding a few months in because pumping at work was “too annoying”, I judged her too.  I hated myself for judging them but I just couldn’t see how they had made decisions that were so completely opposite of what I wanted for my own child. I had fought so hard for breastfeeding, why couldn’t they? My baby would be the safest he possibly could be in the car. Didn’t they want that for their own child?

They never actually knew I was judging them, at least I hope they couldn’t tell.  But still, I hated that I WAS judging them. It took a little while for me to get better prospective and to curb my judgmental ways.

Breastfeeding my baby never became so impossible that my baby was suffering.  It never became so impossible that my overall happiness and mental health were suffering.  I had an ample milk supply and was able to resolve clogged ducts and mastitis fairly easily. Rather than judging my friend for her choice, I realized how hard it must have been for her to make that decision.  She may have said that pumping was too annoying because that reason was easier than admitting her truth.

My son sits quietly in his car seat most days.  When he is upset, a quick switch to listen to “The Wheels on the Bus” or “Row Row Row, Your Boat” generally do the trick and we are right back to having a happy toddler.  I can imagine that if my child cried each and every time we drove anywhere, I would consider trying him forward facing sooner to keep the peace. This mama wasn’t there in the moments that lead up to my friend’s decision to forward face, so I cannot judge it. Nor should I judge.

My son thinks he is the luckiest boy alive whenever he gets strawberries, apples or bananas.  Not giving him sugar wasn’t exactly a difficult thing to do in our household. He chugs water and milk so dehydration has never been a concern we have spent any time thinking about.  For my friend that regularly gives her picky daughter juice to drink, I’m sorry.  I wish I had not judged you the first time I saw you hand over that apple juice.  If my son refused to drink water or milk, you better believe that I would throw my no-sugar stance out the window in an attempt to get him to drink anything.  Want apple juice?  Here you go.  Want grape juice?  Just don’t spill it on my couch.

What really solidified my change in perspective was when I started looking at other decisions I made for my son.  Decisions that I know other moms would judge.  My son watches more TV than I care to admit.  I allow my child to watch TV while he is eating in his high chair.  My now 2.5 year old, still uses his pacifier all day, everyday.  I don’t think of myself as a bad mom for these choices.  I made the changed my plans and made these decisions along the way. For us, these things make life better and for us, they were okay.

Physically I couldn’t keep up with my son while I was pregnant.  My options became, him screaming and crying for me to play with him, or turning on the TV occasionally where he could learn about shapes, colors, counting and more.  I chose his happiness over my thoughts on what other would think was best. Watching TV while eating was the only way that I could get him to eat more than a couple of bites of food.  It also kept him parked in his high chair so that I could safely (and sanely) make dinner for my husband and I.  Cook dinner for a week with a toddler demanding to be held and I guarantee you would change your stance on TV and eating.

Judgmental Mama


His pacifier keeps him happy.  It gives him comfort.  It keeps the peace in our house.  There have been thousands and thousands of little moments and big emotions that have existed in our world that have led to our decision to allow him to still have his pacifier. Heck, he loves his Wubbanubs so much that I created a tutorial on how to fix them when the pacifier breaks off! Just like each and every mommy out there has their own moments, their own big emotions that lead them down the path of making decisions of not just what is best for their child, but also what is best for the overall well-being of their family.

Motherhood is the hardest road that we will ever travel.  None of us need another sancti-mommy making us feel like we are somehow letting our own children down. If you ever find yourself in the seat of the mommy sending judgement to another mommy, just remember all those moments in their lives that you were not there for.  That mom is already judging herself. You don’t know their truth, you don’t know their pain. If we can all stop jumping to judge one another and instead jump to support the difficult choice other mamas are making, maybe, just maybe, being a mama wouldn’t be so damn difficult.


Blush Baby Sprinkle

My mom and a few of my close friends threw a sweet blush Baby Sprinkle for us!! It turned out to be the cutest little pinterest-inspired baby sprinkle ever- complete with a tutu skirt for the dessert table!

The Invitation:

How cute is this invitation?? My mom found the pdf on Etsy and was able to download it, edit it and print it to Staples all on the same day!

The Decor:

Our nursery color scheme is centered around Blush and Dusty Rose colors, so my awesome friends decided to let those colors be the theme for this sprinkle!

Blush Baby Sprinkle


Blush Baby Sprinkle


The Food:

It may be because I am pregnant, but the food was my favorite part of the sprinkle!  Not only was it all food that I didn’t have to cook (is there anything better?) but a lot of the food was PINK!!


Blush Baby Sprinkle

Creamy Beet Hummus: Recipe courtesy of Jessica In the Kitchen

This hummus is amazing!!! Such a crowd pleaser!

Chicken Salad with Croissants from Sam’s Club

Beet Pickled Deviled Eggs: Recipe can be found here!

If you are a fan of traditional deviled eggs, these will not disappoint!

This is a staple of my mom’s for parties.  You can swap out the type of fruit and flavor of sherbet ice cream depending on the theme of your party!

 Mom’s Party Punch:

2 Liter Bottle Sprite, chilled or slightly frozen
2 Liter Bottle Club Soda, chilled or slightly frozen
1 12oz can pink lemonade concentrate, thawed in the fridge
1 pineapple juice can (12oz), thawed in the fridge
6-8 scoops sherbet ice cream (mom used Raspberry for the sprinkle)

Garnish with fresh cut pineapple and raspberries


Blush Baby Sprinkle

Vanilla Cupcakes (made by my sister and ah-mazing!)

Strawberries with the option to sprinkle powdered sugar on them.

Blush Baby Sprinkle

4 Ingredient Strawberry White Chocolate Chip Cookies: Recipe courtesy of Easy Peasy Pleasy

Blush Baby Sprinkle

Heart shaped rice crispy treats dipped in pink colored white chocolate

The Parrrrty!

The hosts of my party!  My mom and my two friends, Rochelle and Bridget!

Blush Baby Sprinkle

Blush Baby Sprinkle

I was so preoccupied with enjoying the shower, that I didn’t think to take photos with guests until the sprinkle was mostly over!

Blush Baby Sprinkle

Blush Baby Sprinkle

Dress: Pink Blush $49 (you can also find it on Amazon)- I’m 5’8″ and this was one of the few maxi dresses

Lace Kimono: $15.99 on Amazon

Baby Sprinkle

My husband Rob, aka Baby-Daddy decided to hang out for the Sprinkle, which was VERY helpful in getting to enjoy our guests instead of keeping up with my son!

Baby Sprinkle

Riley (my 2 year old son) was such a happy camper during the party!  I was so worried that he would be jealous and feel left out of all the gifts that Adalyn was being given! The guest list included the children (<8) of all the women attending, so having other little kids to play with was a wonderful distraction (along with all the balloons he got to chase around our house)!


Disclaimer: I am a participant in the Amazon Services LLC Associates Program, an affiliate advertising program designed to provide a means for me to earn fees by linking to Amazon.com and affiliated sites.

How to Fix a Wubbanub

Is your child OBSESSED with their Wubbanub pacifiers?  My now 2-year-old son is extremely attached to his and has specific names for each character.  He isn’t very creative with those names, but when “COW” broke apart he was devastated.  He carried Cow’s sad little stuffed body around and just repeated the word “broken” over and over again.  Cow wasn’t our first Wubbanub to break, in fact it was our fourth.  The devastation of losing Cow motivated this mama to get with it and figure out a way to fix them all.  Turns out, it was extremely easy to fix a Wubbanub.

After fixing my son’s beloved Cow, I decided that I would fix the other 3 that had broken.  Two had broken over a year ago, so I decided to use pink and purple Soothie pacifiers to turn them girlie for my new daughter due this month.  Below is the transformation of our brown dog and giraffe Wubbanubs into pink and purple, girlie Wubs.

Materials Needed:

Replacement Soothie Pacifiers

Sad Wubbanub Body

Thread that matches the tip of the Wubbanub’s mouth

Heavy Duty Hand Needle

Seam Ripper

Optional: Needle Puller and Thimble (highly recommended to save time and your fingers)

Time:

About 5 minutes per Wubbanub!

Here’s what I did to fix a Wubbanub:

  1. Using your seam ripper, cut the seams of the Wubbanub’s mouth.  Make sure that you get all of the stiches on the ends so that your replacement Soothie will be able to fit in the space.
  2. Remove the left over piece from the original pacifier
  3. Put the replacement Soothie into the newly created hole to make sure that it fits.  Place the Soothie so that the holder portion (the tab hanging off the back) that you will be attaching it by is on the bottom.  This will allow the Wubbanub to properly hang downward while your kiddo is using it.  The mouth hole will also curve with in the same direction that the Soothie base is curving in.
  4. Cut 8″ of matching thread (this will be more than enough) and thread your needle.
  5. In order to hide the original knot, take out the Soothie and put in the first stitch so that the knot is left inside the mouth.
  6. Replace the Soothie and begin stitching at the end where you placed your first knot.  I found it easiest to use the Thimble to push the needle through all of the layers.  I then used the Needle Puller part of the tool to pull the needle the rest of the way, once it was through all the other layers.
  7. If you do not have either tool, you can use a counter top in place of the thimble to help you push the needle through all of those layers.  
  8. Then continue to stitch the entire length of the Soothie base.  Once you have reached the other end, reverse directions and stitch back to the side that you originally started on.
  9. In order to hide the end knot, I again threaded the needle, just through one side of the fabric mouth.  My favorite method of tying knots in hard to reach areas like this is to thread the needle through, but to not pull the thread all the way.  This will leave you with thread on either side of your material.  I remove the needle and then tie these two tails together a few times and cut off the excess length.
  10. Next step: Do a happy dance because you just fixed a Wubbanub and became a hero to your child!!

Disclaimer: I am a participant in the Amazon Services LLC Associates Program, an affiliate advertising program designed to provide a means for me to earn fees by linking to Amazon.com and affiliated sites.

Turning 30 Without You

Turning 30 without you My older brother, Kirk passed away in a freak accident at the age of 29, three days after my own birthday. I was 8 weeks postpartum with my first child and emotionally I crumbled.  As tragic as it was and as much as I missed him I felt sorrier for my parents than I ever did for myself. I am just the sibling. Feeling this way was and is made easier by the fact that others, our friends and family, also focus on the sadness and grief that my mom and dad must be feeling. While I logically know that I was so wrong with this thinking, I still get caught in it almost two years later.

“The loss of a loved one is one of the most tragic and devastating things a person could endure”.

turning 30
My brother rarely smiled for the camera as an adult, so this photo is one of my favorites. It is from our cousin’s wedding in September 2014.

I still wake in the middle of the night, replaying random conversations with my brother.  Replaying the day my father called to tell me what had happened.  Replaying the moment I walked into my parent’s house on the day he died.  Replaying our private visitation at the funeral house.  Replaying the days and weeks that followed his funeral.  Each time, it is as if I have just lost him all over again. It has been 2 years and yet I struggle to find the right words that properly encompass all of my thoughts and emotions.

Turning 30
Kirk and I at my baby shower in November 2015, 3 months before his death.

As I sit here typing, I am a week away from turning 30.  A week away from reaching an age that my brother never got the chance to reach.  Unlike many who feel like their 30th birthday is the end of their youth and the beginning of being “old”, I in contrast feel like I am still so very, very young. At the age of thirty, I still have so much life ahead of me to be lived. So much life that my brother will never get to have.

“When a parent dies, you lose the past. When a child dies, you lose the future. When a sibling dies, you lose the past and the future”.

I am currently 37 weeks pregnant with my second child.  A child that my brother will never hold. Never see smile or hear laugh. After turning 30, I will get to raise my children, perhaps even have a few more.  I will get to travel the world and to celebrate the different milestones of life.  I will be here as our parent’s grow old and I will one day become a grandparent myself.  The countless possibilities of what else I will experience over the rest of my life seem endless and without limit.  I am still angry that all of those things were robbed from Kirk.  I am still so angry that my children will never really get to know their Uncle Kirk. Pictures and stories will be all that they have. I am still so angry. Still so sad.

My grieving process is still very much a process.  I would be lying if I said that I was anywhere close to being “over it”. Every new step in my life- having another child, celebrating birthdays, buying new homes is another part of my life that he will be absent from. So while I celebrate turning 30, I also grieve that I will be older than my older brother ever got to be.


What’s In My Hospital Bag- The Second Time Around

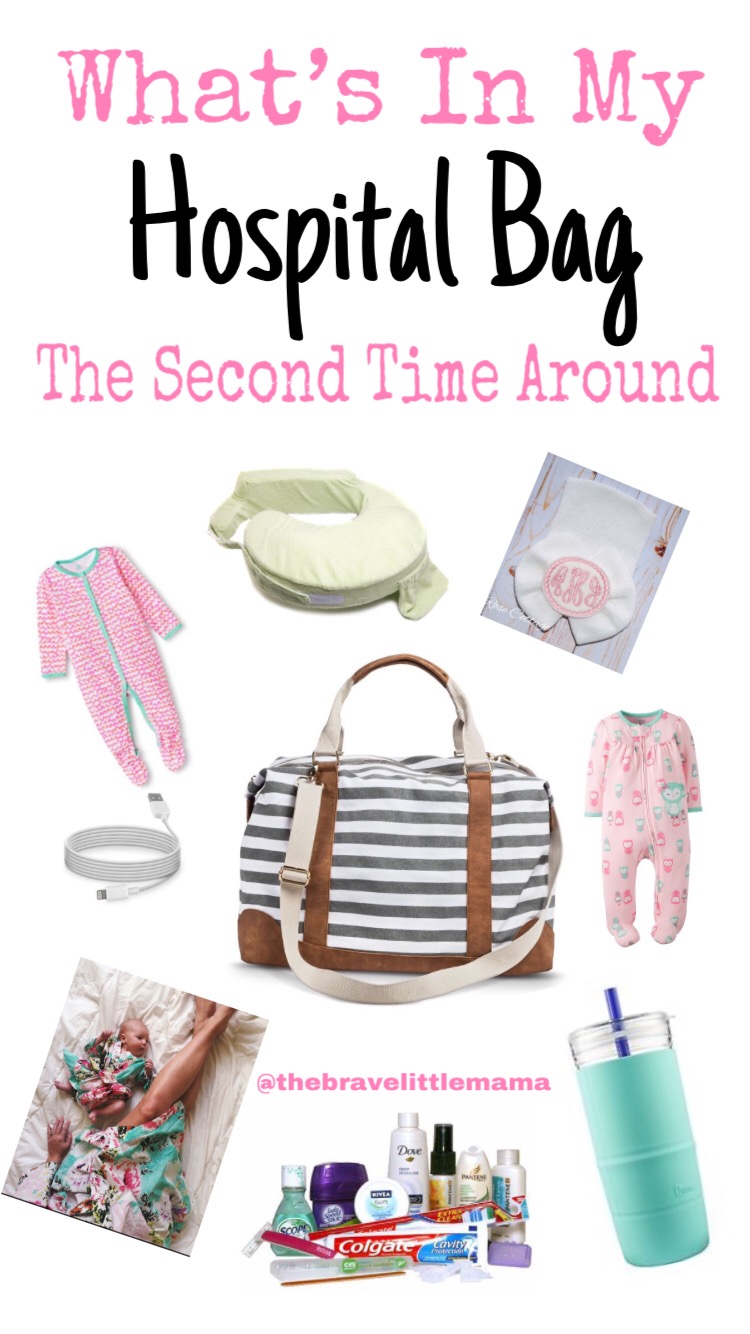
When packing your hospital bag, it is important to remember that some things are a MUST HAVE while other things are a NICE TO HAVE! There are dozens of different lists out there that make it seem like your entire hospital experience will be ruined if you forget something. Do not worry!! Even if you forget your entire hospital bag at home, the hospital provides a version of pretty much everything that you will need. I used a Weekender bag from Target for my hospital bag, my exact bag is not still available 2 years later, but this bag from Amazon is pretty similar.

I have had a lot of friends that are pregnant with their first ask me what I recommend they actually pack in their bags. Most of the items that I am bringing this time around are centered around my comfort and around convenience. Here is a list of what I am packing:

This post contains affiliate links. See affiliate disclosure here.

What's in my hospital bag

For Mom

1. My own pillow in a colorful pillowcase

While the hospital does have plenty of pillows on hand, I would prefer to have my own pillow. My own pillow is much more comfortable (not that you really get the chance to sleep). Also a colorful pillowcase will look less sterile in photos. Technically, my pillow will probably not go inside of my hospital bag. If you forget your own pillow, you will be okay!

2. A Nursing Pillow

With my first baby, I didn’t bring a nursing pillow and instead used a few pillows to prop him up. For the most part, this worked fine. I will be bringing the My Breastfriend nursing pillow with me. It clips into place and I won’t have to deal with the pillows sliding out-of-place. Again, if you do not bring a nursing pillow, you will be fine.

3. A large drinking cup with a straw

Hospital Bag Guide

Congratulations, you just had a baby. For the most part, you will spend your time at the hospital laying in bed with others waiting on you. In an effort to stay hydrated and allow my milk supply to come in, I was constantly drinking water. The hospital I delivered at provides small Styrofoam drinking cups which required my husband to refill it constantly. To save him the annoyance and to myself having to go a single second with an empty cup, I am bringing a large cup. This cup is my favorite! Again, we survived the first time without this and you will too if you forget to pack your own. I will probably save space in my hospital bag by stuffing random items inside of the empty cup.

4. Toiletries

The hospital does provide some of the basics, just like a hotel does. I prefer to have my products. I have a pre-packed a bag of my toiletries that includes duplicates of my everyday items. This eliminates the chance I will have to raid my bathroom to grab anything when I am in labor. I have also added products that come with added convenience face cleansing wipes that don’t require that you get to a sink, dry shampoo in case you are not up for a shower and mouthwash to name a few.

5. Make Up

I wish I was one of those women that gives birth and then looks like a glowing goddesses after. However, I am not. I do not plan on putting on a full face of make up while I am laying in a hospital bed. But, I do want to be able to freshen up my appearance before photos are taken and visitors arive. My hospital bag will contain just a few staple items: mascara, concealer, bronzer and blush.

6. A phone charger with an extra long cord

Chances are that you are going to need to charge your phone a few times during your hospital stay. Between taking photos of your new baby, making contact with friends and family or googling everything that you are embarrassed to ask the nurse or doctor, you are going to drain your cell phone battery quickly. We didn’t bring a long phone charger the first time around and my husband had to constantly bring my phone to me while it was charging. I found a 10 foot charger on Amazon and plan to use it this time around. If you may be alone at the hospital during your stay at any point, I would bump this item up from nice to have to must have for your hospital bag.

7. A pretty hospital gown (with matching swaddle for baby)

Without a doubt, this is not a necessary item that you MUST have. I love how lively and happy all of the floral robes look in comparison to the basic hospital robes that are provided (see photo above). I was freezing in the provided hospital robe and ended up wearing a fluffy plush robe that my husband went home to get for me. For this delivery, I found an awesome robe on Etsy that

Hospital Bag Guide has built-in opening for more incognito nursing. I struggled A LOT with my first baby and balancing having so many visitors with attempting to nurse him. This robe will make it easier to nurse without having to kick out my visitors and without having to feel overexposed while feeding her. You can read about that struggle, here.

8. Clothes to go home in

There are a few things to take into consideration when picking out clothes to pack for you to wear home. 1. You will still have a belly that is around the size of your 6 month pregnant belly. 2. You should be wearing the hospital mesh underwear + a huge pad or your own granny panties + a huge pad. 3. If you have a c-section, you will not want the waist of pants anywhere near your incision site. I am packing two outfits: Postpartum leggings and a long tunic top (comes way below my butt) assuming that I give birth vaginally and a long flowy maxi dress in case I end up having a c-section. I have heard of lots of mamas just wearing home the same clothes they came to the hospital in, so if you forget a change of clothes, you can always do that!

For Baby

1. Personalized hat

The hospital provides everything that your baby will need during your stay. Diapers, a shirt, a swaddle blanket and a plain white hat. I think the plain white hats are very generic and boring. Colorful/personalized hats make for much cuter photos! Etsy has a great selection of personalized hats! Chances are you will still know your baby’s name even if he/she isn’t wearing a special personalized hat.

2. Clothes to go home in

The hospital does provide a shirt, but not pants. You baby’s legs will need to be covered when going home. I will be bringing two sleep and play outfits. One sized Newborn and one sized 0-3 months. I will be prepared regardless of how big she is (fingers crossed she isn’t TOO big!!). Also, remember that a car seat strap will have to go between your baby’s legs. An outfit with actual pants vs. a gown will be much more comfortable for your baby. I will be delivering in March, which has very unpredictable weather here in Charlotte. So I will also have a fluffy blanket on hand to put on her, in the event that it is really cold out.

For Dad

1. Whatever he packs for himself.

Maybe I am a jerk here, but I am already responsible for myself and our new baby. My husband is a fully functioning adult and he can darn well pack for himself. Sure, I will help to remind him to get his bag packed, but I am not packing it for him.

2. Breath Mints

This item will be ALL the bags that come to the hospital. Pregnancy gives me a super strong sense of smell and zero tolerance for anyone with bad (if I can smell anything, it is bad) breath. While technically this item will be for anyone that may be come contact with me, it is listed as an item for dad since he will be with me the entire time. I want to focus on bringing a baby into the world instead of ducking someone’s exhales when they are talking to me. Breath mints are pretty cheap, so I have already added them to my purse so that I limit the chances that we will not have them if somehow I make it to the hospital without my hospital bag.

3. Snacks

This is also for your comfort, but the hospital will only provide food for you, the patient and not for him. Having snacks on hand will avoid anyone becoming hangry at any point in time. We had so many visitors that brought food, that we really didn’t end up eating the snacks. With that in mind, I still think it is always smart to have your own food available.

Commonly Recommended Items that I am not bringing in my hospital bag (and why):

A Nursing Bra

My robe will provide all the cover that I need and I want to be able to reap all the benefits of skin to skin without having the fabric of a nursing bra in the way.

Socks-

The hospital I deliver at provides socks with non-slip bottoms that are thick and warm. I see this as one less thing to pack, plus I don’t own non-slip socks as an adult so it is also one less thing to buy.

PJs-

Giving birth is a messy, messy process and I have no desire for any of the wonderful P.J. pants to be anywhere near that mess for the first few days. During my two-day stay, I constantly had nurses coming in to check the pee-pad I was laying on (think of those pads you use to train puppies) for bleeding. Wearing P.J. pants would have made that process way more inconvenient and likely more awkward.

Towels-

The hospital provides towels for you to use and I have zero desire to risk getting blood on my own personal towels. Yes, their towels are not as large or as fluffy, but the two minutes I will be using them is not worth bringing my own.

Hair Dryer-

The hospital will provide a hair dryer. Again, it is not as nice as my own personal hair dryer is, but hair dryers are large and bulky. I don’t want to make room in my bag for my own and I survived just fine without my own the first time around.

A Diaper Bag-

Given that the hospital provides everything that your baby needs during your stay, the few items that I am bringing for baby will fit just fine in my own bag. I brought a diaper bag the first time. Aside from my husband carrying it in and then back out of the hospital, we did not use it.

Check out my 8 Must-Haves to Make Pregnancy Suck Less!

10 Things I Wish I did BEFORE my Baby Arrived

As I sit here pregnant with my second child, I am trying to make sure that I prepare better this time around.  This mama learned A LOT in the first month with my son. I found myself wishing that I had done so many things differently while I was still pregnant.  Hopefully these lessons learned will make baby number two (hopefully) an easier experience. Hopefully my not so great experiences can also help you avoid my mistakes.

 1. Set expectations for hospital visits before you get to the hospital

Other than thinking about who would be in the room while I was in labor and while I was delivering, I didn’t really put thought into this at all. I learned quickly that learning to breastfeed a newborn is substantially more difficult when you have guest visiting unexpectedly and non-stop for a 7 hour window of time. Let’s not even get into those postpartum bleeding checks or attempts to walk to the restroom. I don’t want to sound ungrateful; I appreciated how much our friends and family wanted to show us support. However, I ended up extremely overwhelmed from all the visits.  This led to a lot of unnecessary anxiety and stress for me.  My husband had no idea that so many visitors were so stressful for me. I am a people pleaser and made a point to try to not make anyone feel unwelcome.

This time around we will be setting a no visitors for 24 hours rule.  Immediate family will be welcome for a SHORT visit that first day, because I am not mean enough to want to keep a grandparent from meeting their new granddaughter. Everyone else will have to wait.  Everyone is different, but for me, having the first 24 hours without the 18 visitors that we had last time (no joke, 18 visitors) will make the world of difference.

2. Plan for childcare if you will be returning to work before you go on maternity leave

Going back to work after maternity leave is already very hard and emotional without having to add in the unnecessary stress of not knowing IF you will even find somewhere to care for your new baby. If possible, you should reach out to other parents in your area when you first get pregnant to get a feel for how competitive childcare is in your area. Luckily this one ended up working out fine for us. We ended up finding a daycare right near our house that had an opening in their newborn room.  I have many mama friends that have not been so lucky and find themselves 1-2 weeks away from the end of their maternity leave with no plan in place.

3. Make sure that the baby clothes you have are practical

I laugh at this one a little but I still feel that it is necessary to talk about.  Most of the baby clothes that we had for Riley were all gifts from our baby showers.  We quickly learned that all those really cute suits and sweater vests were not practical for a newborn to wear daily. I was not going to dress my newborn up in an adorable smocked outfit to hang out around our house. Period. Newborns need comfortable clothes and lots of them (to get you through all those poop blow outs).  I also have an intense hatred for baby socks. They do not stay on. I highly recommend stocking up on a bunch of sleep and play outfits for your newborn to keep their feet warm!

4. You will need more than a breastfeeding pillow for nursing

I planned to breastfeed my baby and prepared by purchasing few nursing pillows. I soon realized that I had failed to really make a plan to help make my life easier in those first weeks.  Breastfeeding can take up A LOT of time, especially in the beginning when your baby is learning to latch and they are not very efficient at transferring milk. Top of the list for how I didn’t prepare properly was food and clothes.  I consider these such a HUGE ticket item, that they are both separately listed below!!

Other things that would have helped would have been to already have nipple cream, cloth diapers (for messy feeding sessions) and breast pads on hand when I returned from the hospital.  Also, joining a breastfeeding support group on Facebook BEFORE the baby comes will make it that much easier to find immediate support and get additional information as you enter the world of breastfeeding.

5. There is more to pumping than just what pump you will use

I ended up picking one of the top pumps out there and overall, it worked out well for me. I was able to successfully pump at work for my son until he was 16 months old and weaned. However, there are a ton of cool features that other breast pumps have that mine did not have that I wish I would have considered. Joining a breastfeeding support group on Facebook can also help with picking out a pump as you can get real life feedback from actual people.  I am actually planning on switching to a different breast pump this time around.

Beyond choosing the pump itself, I also did not consider any of the real life details surrounding successfully pumping at work.  Day one back at work I found myself armed with a small tote bag, my purse, my lunchbox and a separate cooler. I quickly determined that being a lady with 4 bags was not a great set up and purchased a bag meant to carry my pump.  It was a splurge purchase for me but it was a game changer. Do yourself a favor and find a pumping bag you love before returning to work.

6. Think about postpartum clothes for yourself

For months and months I spent focused on my new baby.  What would he wear, what would he lay on to play, what kind of diapers were best, etc.  Never once did I stop to think about what I would be wearing in those postpartum months. Hint: quick boob access will become a necessity of life.  Week one I had to send my sweet in-laws to the store to buy me nursing clothing. Outside of a single nursing bra I had worn before during my pregnancy, I had nothing. It’s okay to start out with just a few basics, bras, camisoles and a few shirts. If you are like me and have an oversupply of milk, you may need lots of extra nursing clothing for when you leak.  My favorite nursing shirts are these criss-cross cardigans from Free to Live.

7. Stock up on food before your sweet baby arrives

As mentioned above, breastfeeding can take up a lot of time.  My son always fell asleep on me immediately afterwards, so I ended up being trapped underneath him. I loved every moment cuddled up with him, except that most of the time this meant that I was missing meals and going hungry.  If breastfeeding, you need to keep up your caloric intake to continue to produce enough breast milk. Figuring out a way to make sure that you have eaten is important.

Stocking up on frozen foods before baby arrives is a great start. Keep in mind that some breastfed babies may need their mama to switch to a dairy free diet, so go easy on the milk and cheese! Food that can be prepared in a few minutes or that will still taste good when it ultimately cools to room temperature before you actually get to eat it are the best.  Some of my favorites are chicken salad (made from frozen chicken cooked in slow cooker), peanut butter and jelly, soup of any kind (hello, extra hydration) and fruit of any kind!

8. Set up Amazon Subscribe and Save

I had Amazon Prime for years and never knew that Subscribe and Save existed until I became a mom.  With Amazon Subscribe and Save you get a monthly delivery of items on a set day.  The more items you subscribe to, the larger discount you get on each item.  Each individual item can be set for a tailored delivery schedule- every month, every 2 months, every 3 months, etc.  We have diapers and wipes delivered monthly but other items are delivered less often.  We ran out of diapers a lot before we discovered S&S. Since setting this up, we have never run out of the basics. We also get a better price than you can find in store.  Disclaimer: if you are a coupon pro, you can likely find these items cheaper with a coupon.  I am not a coupon pro and love that I can consistently purchase these items at a lower price.

9. Plan for Newborn Photos

Professional photography is important to me.  Having these memories captured forever is priceless. The last thing you want to do is find yourself a day away from your scheduled photography session with nothing to wear because your maternity clothes are too big and your non-maternity clothes are still WAY too small.  I was so caught up with all the money that we were spending around this time. I felt SO guilty spending any money on myself.  You don’t have to get something new, but make sure that you have something that you feel comfortable and beautiful in.  You just created life, you deserve to feel great while taking photos to commemorate this huge life milestone.

10. Talk to your spouse about paternity leave before baby is born

Somehow we never talked about what my husband would do immediately following our son’s birth.  We didn’t discuss it and we ended up on completely different pages.  My son was born the day after Christmas, so my husband already had that week off of work.  To my surprise, he returned to work just a few days later.

My son was attached to me pretty much all day every day. Between breastfeeding and his lengthy milk drunk naps that followed, my husband felt that he wasn’t needed.  Me on the other hand felt completely abandoned and overwhelmed when I was suddenly home alone with my tiny newborn baby for 10 hours a day.  This pregnancy I have already set the expectations that he will stay home with me for a minimum of 2 weeks. This will let us find a new routine for our little family before I am left on my own with both kids.

Motherhood is hard and there is really no way to plan for everything.  Is there anything that you wish you would have done before your baby arrived?  I would love to hear about it! Comment below.

Packing your hospital bag? Check out my list of What’s In My Hospital Bag- The Second Time Around

I am a participant in the Amazon Services LLC Associates Program, an affiliate advertising program designed to provide a means to earn fees by linking to Amazon.com and affiliated sites.

Instructions for Building an Easy Crib Platform

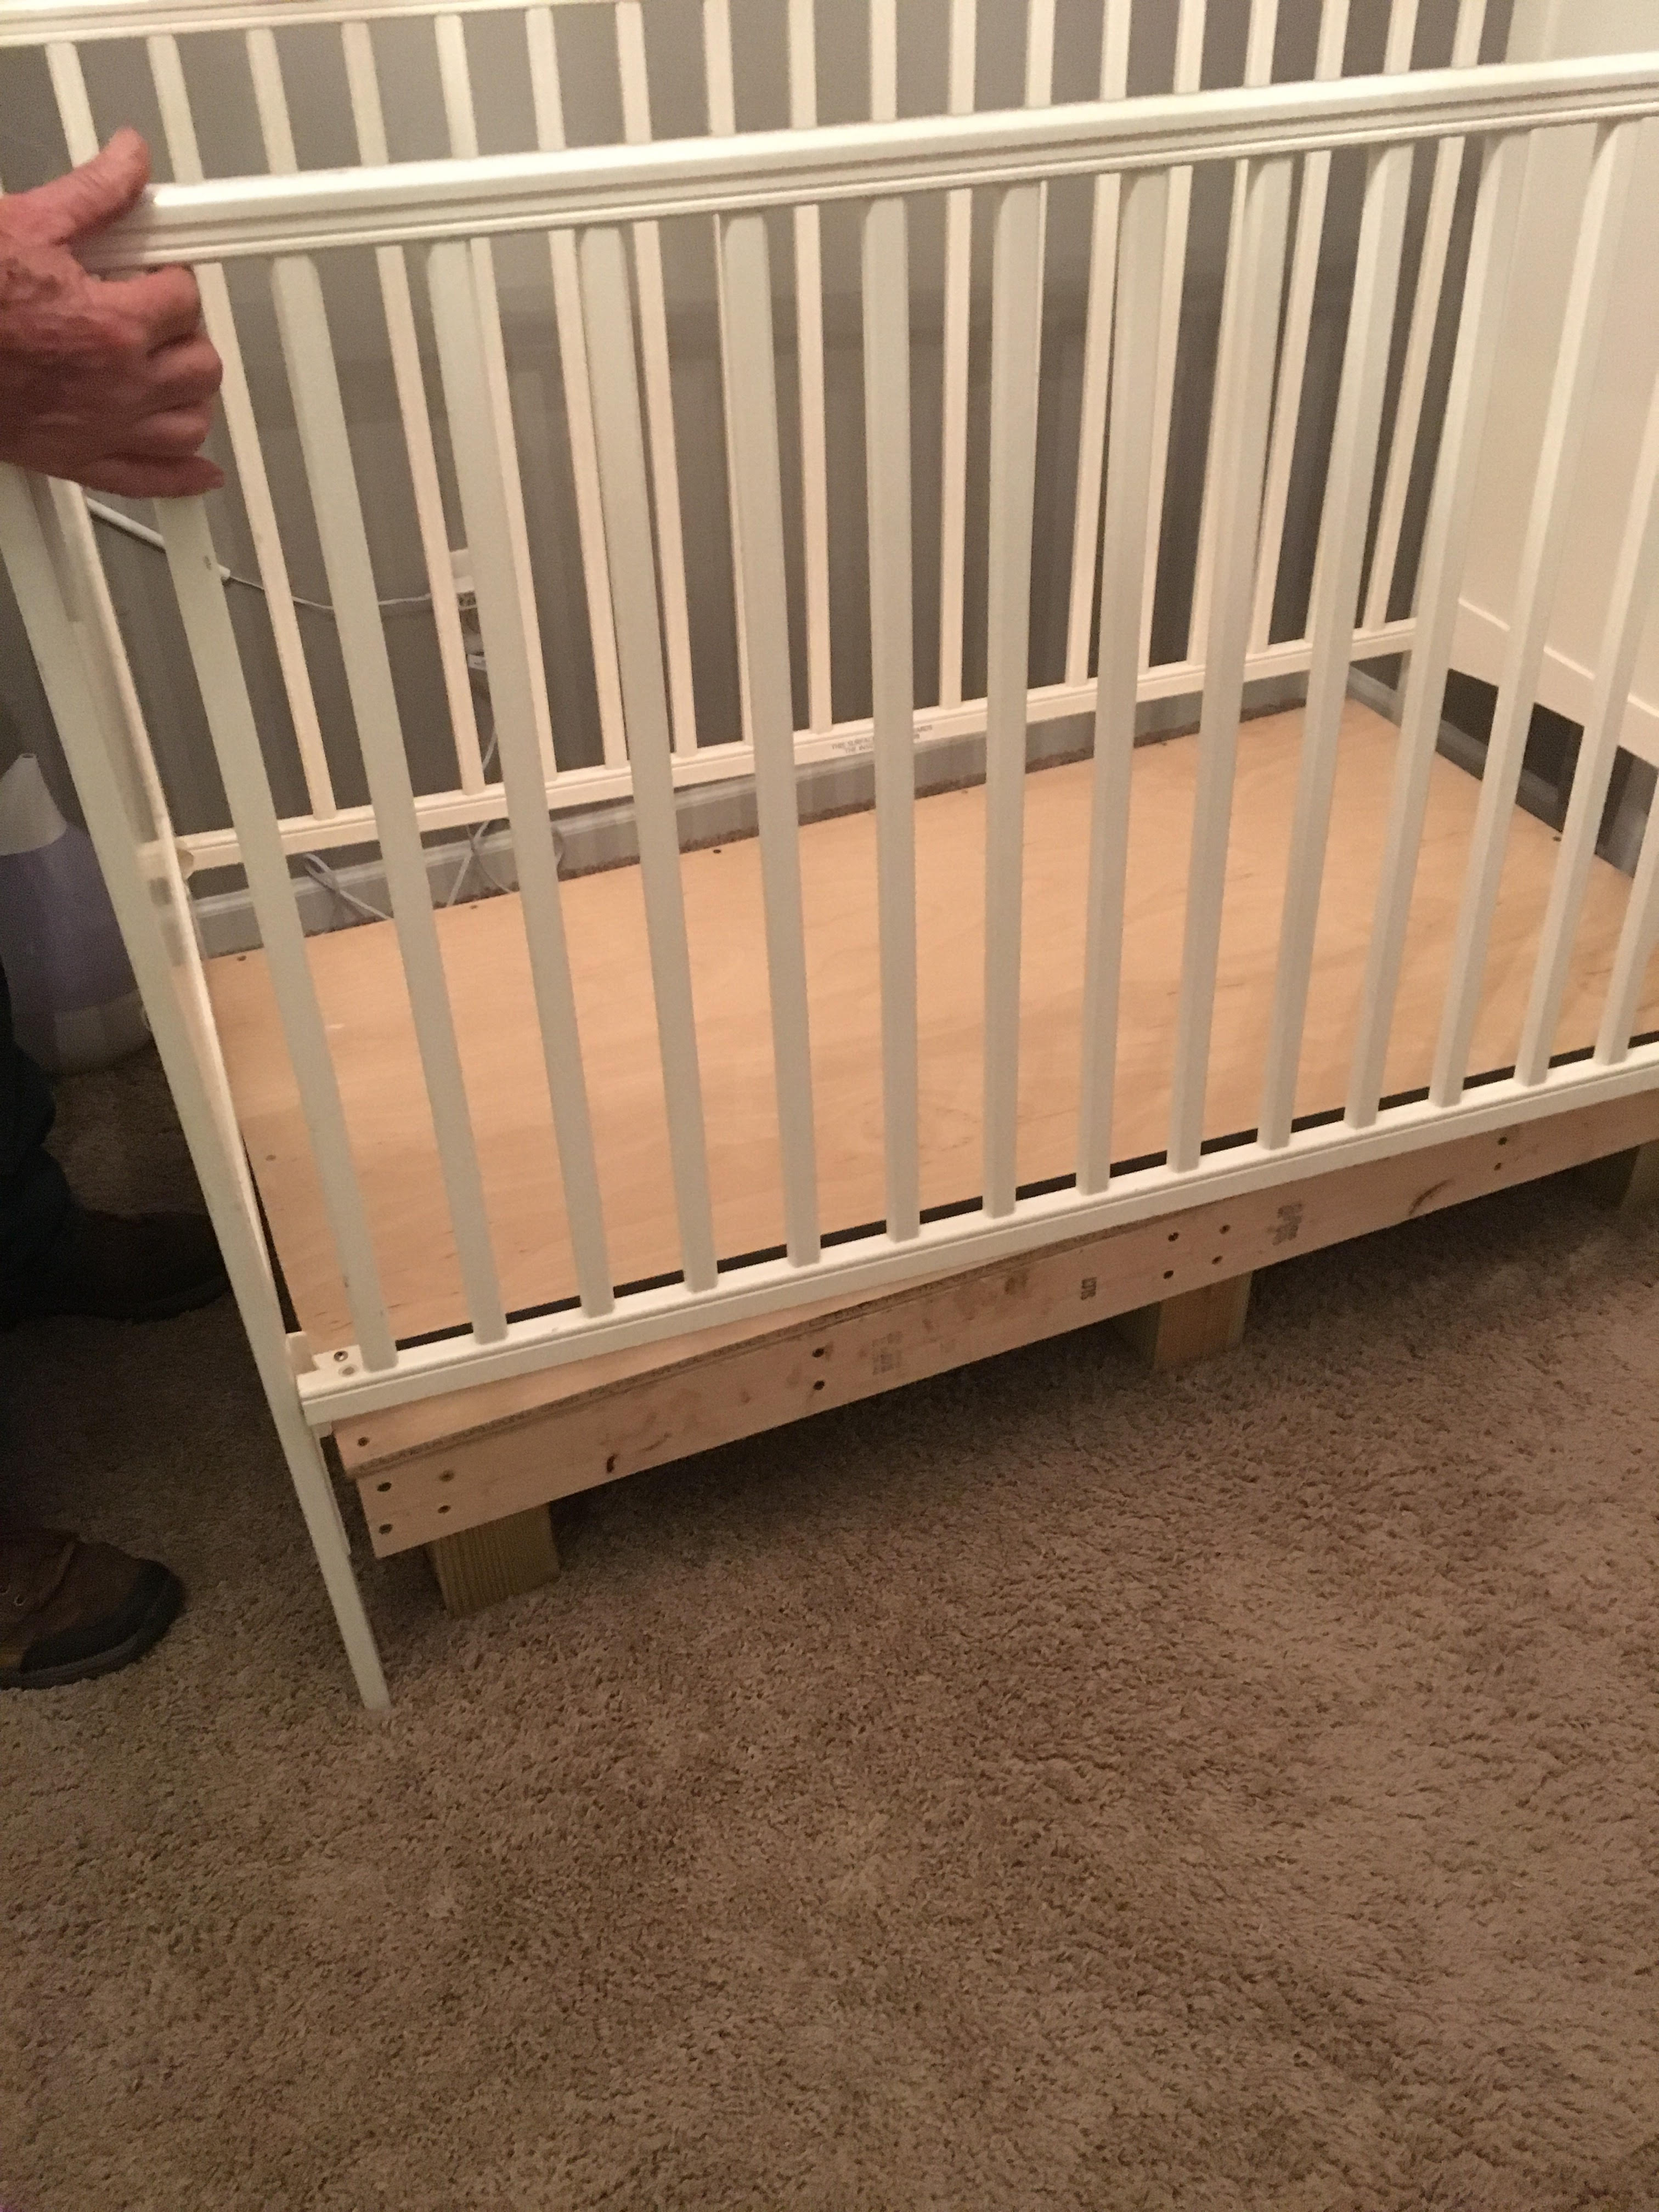
Combining a few different ideas that I saw online, I decided to build a crib platform for my toddler’s mattress that would allow us to lower it an additional 3 inches.  Really, we could have lowered it up to 4.5 inches, but I am pregnant so I wanted to still be able to lay him in the crib without having to drop him the last few inches.  I had my plan in place, so I enlisted my dad (aka the man who owns a saw) to help me turn it into reality.

Here’s what we did:

Step 1: Measure the crib

From this step, I knew that I needed a crib platform that would be 27″ wide x 51″ long x 8.5″ high.  Note, I opted to go a 1/2″ smaller than the actual measurements for length and width so that it would be easier to move the crib platform once it was in place.  If you don’t have a tape measure handy, you can always look up the measurements of the crib mattress that you own. Most standard cribs are similar size.

Step 2: Cut your wood to size

My dad helped with this part (yay for dads) since I do not own a saw, yet.

2 x 51″ long 2 by 4 pieces

5 x 23″ long 2 by 4 pieces

6 x 8.5″ high 4 by 4 posts

1 x 51″ x 27″ x 1/2″ piece of flat wood

Crib Platform

Step 3: Line up the 2 by 4s to make the frame then screw them together

We screwed 2 screws to connect the wood at each connection point (see photo).

Crib Platform

Crib Platform
Riley LOVED helping Grandpa build!


Step 4: Put the 6 8.5″ post in place.  Screw these into place

We also used 2 screws at each connection point to attach the posts (each arrow = 2 screws in the photo).  It is important to make sure that when you are screwing the posts on, that the legs are all flush with the top of the frame.  This will ensure that your legs are all the same length and that the crib platform is level.

Crib Platform


Step 5: Put the top on your frame

Now that you have your frame and legs in place, you can put the top on your toddler’s new crib platform.  Put the 51″ x 27″ x 1/2″ piece of wood on top and screw it to the frame.  We put a screw in each corner and then added additional screws around the edge to connect it.

Crib Platform


Step 6: Sand the edges

Once everything was put together, I ran sanded along the edges to get rid of any rough edges that might catch my crib skirt.

Step 7: Remove existing mattress platform from your crib

This step was pretty simple. Take the metal platform off of your crib.  For us, we just had to remove 4 screws, remove the platform and then replace the screws since the same screws were also attaching the bottom of the crib rail.

Step 8: Put the crib platform in place

Once put together, the crib platform is pretty heavy.  You will likely need 2 people for this to ensure that you do not damage your walls.Crib Platform

Step 9: Replace bed skirt and put your mattress back in place

Once your bed skirt is in place, you will not be able to see the unfinished wood of the crib platform anymore.  Congratulations, your crib mattress is now 3 inches lower.

Crib Platform


To read about the other two changes we made to our routine to help stop crib climbing, read about them here.

How to Stop Your Toddler From Climbing Out of their Crib

Stop Toddler Crib Climbing

This post contains affiliate links. See affiliate disclosure here.

Chances are that if you are reading this, then you also had the horrible experience of waking up to the sound of your child falling out of their crib to the ground.  The initial thud noise was probably followed by a loud wailing from your now traumatized child.  At least, that’s how it went for us. This delightful experience immediately sent me searching for options of how to stop my toddler from climbing out of the crib again.  There were a lot of suggestions out there, but most of them lead to converting his crib to a toddler bed, which is a step we are not ready for.   As it stands, my son currently naps for 2-3 hours at a time and sleeps at night for 12-14 hours.  There was just no way I was going to change-up his current sleeping situation unless I had no other option.

We decided to use a combination of three different ideas so that we could increase our chances of success.

    1. Move the crib against the wall! We moved his crib so that one of the long sides was against the wall.  A lot of people already have their cribs like this, but in doing so, you reduce the number of sides that your naughty toddler has available to climb out of.  Our crib is the same height on both of the long sides., so it didn’t matter which side ended up against the wall.  If your crib has a higher side, put the lower side against the wall so that you have even more of a barrier for your toddler to have to climb over.
    2. Sleep Sacks! A sleep sack limits how much your child can can extend their leg upward.  My son has been unzipping his sleep sack lately, so we started zipping his sleep sack so that the zipper was at his back.  This was to eliminate the chances that he would unzip it and have a full range of motion.  Our favorite sleep sack is the Zipadee Zip!!Stop Crib Climbing


  1. Lower the crib mattress! We built a platform so that we could move his crib mattress down an additional 3 inches.  This was definitely the “big gun” in our three-part plan.  Instructions for how we built this are listed hereCrib Platform to stop climbing!

It has been 2 weeks since the fall that started my frantic online searching for solutions.  Since putting all three of these changes into place, we have not had any more climbing out of the crib.  My son has been awake and ready for me for 15+ minutes before I get him, which gives me a lot of confidence that the lack of falling is actually because of these changes and not just because of his lack of trying.

Have you done something different to keep your toddler from climbing out of the crib?  I would love to hear what worked for you in the comments below!

How to Break Your Toddler’s Wubbanub Habit